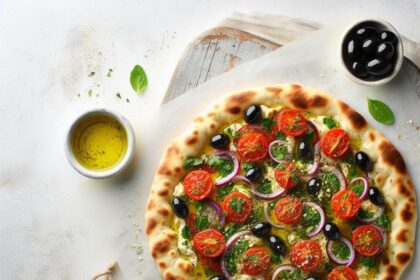
Wheat free: The Allure of the Perfect Wheat-Free Pizza Crust
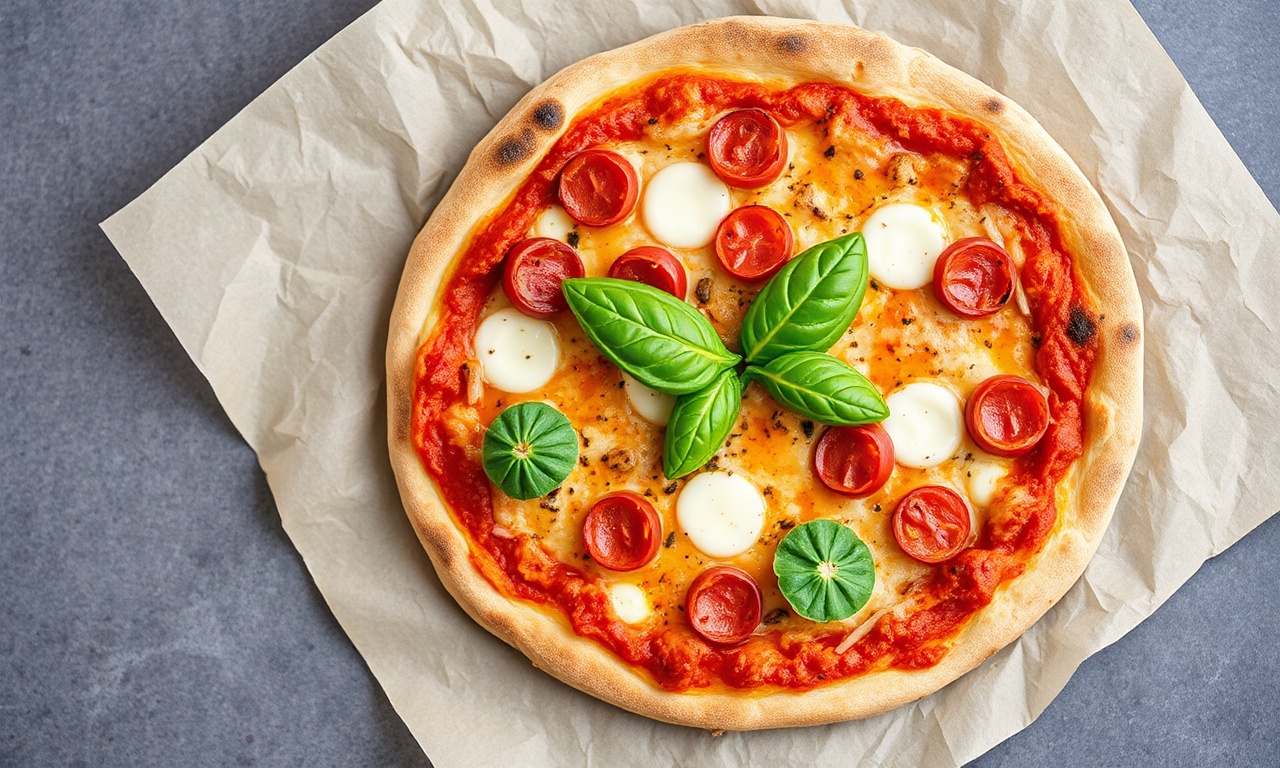
When it comes to Wheat free, Imagine this: the aroma of baking dough wafting through your kitchen, the anticipation of a perfectly blistered crust, topped with your favorite vibrant ingredients. For many, pizza is more than just a meal; it’s an experience, a comfort, a celebration. Yet, for those navigating a gluten-free lifestyle, achieving that quintessential pizza crust – that delicate balance of chewy interior and crisp exterior – can feel like chasing a culinary ghost. The common pitfalls are all too familiar: a crust that crumbles like sawdust, a texture that’s gummy and dense, or a flavor that’s bland and uninspired.
- Wheat free: The Allure of the Perfect Wheat-Free Pizza Crust
- Why Wheat free Matters: Understanding the Pillars of Wheat-Free Dough
- Wheat free in Crafting Your Ultimate Wheat-Free Pizza Dough: The Essential Recipe
- Mastering the Art of Wheat-Free Crust Texture
- Troubleshooting Common Wheat-Free Pizza Crust Issues
- Nutritional Insights and Customization
- The Final Flourish: Elevating Your Wheat-Free Pizza Experience
- Frequently Asked Questions
- Q1: Can I use a pre-made gluten-free flour blend for this recipe?
- Q2: Why is my wheat-free pizza crust not browning properly?
- Q3: How can I make my wheat-free pizza crust crispy on the bottom?
- Q4: Can I freeze wheat-free pizza dough?
- Q5: What is the difference between psyllium husk and psyllium husk powder?
The quest for a truly satisfying wheat-free pizza crust is a journey many embark on, often with disappointing results.
In the context of Wheat free, But what if the secrets to a transcendent wheat-free crust were not so elusive? What if, with the right understanding of ingredients, techniques, and a touch of culinary intuition, you could unlock the door to pizza perfection, gluten-free?
Around Wheat free, This pursuit is not merely about dietary necessity; it’s about reclaiming the joy of a beloved dish without compromise. The burgeoning market for gluten-free alternatives has certainly expanded options, yet many store-bought crusts or simplistic recipes fall short, leaving a void in the hearts (and stomachs) of pizza aficionados. The challenge lies in replicating the complex structure that gluten provides, which gives traditional pizza dough its elasticity, chew, and characteristic rise. However, modern flour blends, combined with a deeper understanding of hydrocolloids, starches, and fermentation, have paved the way for truly exceptional wheat-free alternatives.
Regarding Wheat free, The pursuit of a perfect wheat-free pizza crust is proof of culinary innovation, proving that dietary restrictions need not dictate the quality of our most cherished meals.
When it comes to Wheat free, This article is born from years of dedicated experimentation and a deep understanding of the science and art of gluten-free baking, specifically for pizza. We’ll explore the foundational elements that make a wheat-free crust sing, demystify the often-confusing world of gluten-free flours, and provide actionable techniques that will elevate your homemade pizza from a compromise to a triumph. Prepare to start that will equip you with the knowledge and confidence to create wheat-free pizzas that will impress even the most discerning palates.
Why Wheat free Matters: Understanding the Pillars of Wheat-Free Dough
In the context of Wheat free, The foundation of any great pizza crust, wheat-free or otherwise, rests on a few fundamental principles: hydration, the right blend of flours, and proper handling. For wheat-free baking, these pillars require a slightly different approach, as we must compensate for the absence of gluten, the protein network that gives traditional dough its structure and elasticity. Gluten’s unique properties allow it to trap gases produced by yeast, leading to a light, airy crumb. Without it, we need intelligent ingredient choices and meticulous technique to achieve similar results.
Around Wheat free, The hydration level is paramount. Wheat-free flours, particularly those based on starches and certain gums, absorb liquid differently than wheat flour. Often, a higher hydration percentage is required to achieve a workable dough and prevent a dry, crumbly outcome. This can be counterintuitive, as a very wet dough can seem difficult to handle. However, this increased moisture is crucial for developing a tender crumb and a crust that browns beautifully. Think of it as giving the flour particles enough room to swell and bind effectively.
Regarding Wheat free, The choice of flour blend is arguably the most critical decision. A single gluten-free flour rarely suffices. A synergistic blend of grains, starches, and binders is necessary to mimic the functional properties of wheat. Common components include:
- Starches: Tapioca starch, potato starch, and cornstarch contribute to a chewy texture and help with browning.
- Grains: Rice flour (white and brown), sorghum flour, and millet flour provide structure and a more neutral flavor.
- Binders: Xanthan gum or psyllium husk are indispensable. They act as emulsifiers and thickeners, mimicking gluten’s binding and elastic properties. Psyllium husk, in particular, is celebrated for its ability to create a more bread-like, chewy texture and improve dough extensibility.
When it comes to Wheat free, Finally, proper handling ensures that these ingredients work harmoniously. Unlike wheat dough, which benefits from extensive kneading to develop gluten, wheat-free dough is often mixed just until combined. Overworking can actually break down the starches and result in a gummy texture. Gentle folding, resting periods, and controlled shaping are key to coaxing the best out of your gluten-free flour blend.
Wheat free in Crafting Your Ultimate Wheat-Free Pizza Dough: The Essential Recipe
In the context of Wheat free, This recipe is designed to be a robust starting point, yielding a pizza crust that is both delicious and structurally sound. It leverages a blend of flours and the power of psyllium husk to deliver a truly satisfying result.
Ingredients:
- For the Psyllium Husk Gel:
- 30 grams (4 tablespoons) whole psyllium husks (not powder)
- 360 ml (1 ½ cups) warm water (approximately 105-115°F or 40-46°C)
- For the Flour Blend:
- 200 grams (1 ¾ cups) superfine white rice flour
- 100 grams (¾ cup + 2 tablespoons) sorghum flour
- 80 grams (⅔ cup) tapioca starch
- 40 grams (⅓ cup) potato starch
- 20 grams (3 tablespoons) xanthan gum (omit if your psyllium gel is very firm and you are confident in your binding)
- For the Dough:
- 7 grams (2 ¼ teaspoons) active dry yeast or instant yeast
- 1 teaspoon granulated sugar (for yeast activation, optional)
- 10 grams (1 ½ teaspoons) fine sea salt
- 30 ml (2 tablespoons) extra virgin olive oil, plus more for greasing
Equipment:
- Medium bowl
- Large mixing bowl
- Whisk
- Rubber spatula or dough scraper
- Plastic wrap
- Baking sheet or pizza stone
Preparation Method:
- Prepare the Psyllium Husk Gel: In a medium bowl, whisk together the whole psyllium husks and warm water. Let it sit for 5-10 minutes, stirring occasionally, until it forms a thick, gelatinous mixture. This gel is crucial for binding and providing elasticity.
- Activate the Yeast (if using active dry yeast): In a small bowl, combine the yeast with the optional sugar and about 60 ml (¼ cup) of the warm water. Let it stand for 5-10 minutes until foamy. If using instant yeast, you can skip this step and add it directly to the dry ingredients.
- Combine Dry Ingredients: In a large mixing bowl, whisk together the superfine white rice flour, sorghum flour, tapioca starch, potato starch, xanthan gum (if using), and sea salt. Ensure everything is thoroughly combined to distribute the binders evenly.
- Form the Dough: Add the activated yeast mixture (or instant yeast), psyllium husk gel, and 30 ml (2 tablespoons) of extra virgin olive oil to the dry ingredients.
- Mix the Dough: Using a rubber spatula or a sturdy spoon, mix everything together until a cohesive, sticky dough forms. It will be much wetter and stickier than traditional wheat dough. Avoid overmixing; just combine until no dry flour remains.
- First Rise (Bulk Fermentation): Cover the bowl tightly with plastic wrap or a damp kitchen towel. Let the dough rest in a warm place for 1 to 1.5 hours, or until it has visibly increased in volume. This gentle fermentation allows the yeast to work and develop flavor.
- Shape the Dough: Lightly oil your hands or a dough scraper. Turn the dough out onto a lightly floured surface (using more rice flour or tapioca starch). The dough will be soft and spreadable. Gently shape it into a ball. If it’s too sticky to handle, let it rest for another 10-15 minutes.
- Second Rise (Proofing): Place the dough ball on a piece of parchment paper lightly dusted with rice flour or cornmeal. Cover it loosely with plastic wrap or a damp towel. Let it proof for another 30-45 minutes in a warm spot.
- Preheat Oven and Baking Surface: While the dough is proofing, preheat your oven to its highest setting, typically 475-500°F (245-260°C). If using a pizza stone or steel, place it in the oven during preheating to ensure it’s piping hot.
- Shape the Pizza Base: Gently press and stretch the dough from the center outwards on the parchment paper to form your desired pizza shape (round or rectangular). Aim for a thickness of about ¼ to ½ inch. Don’t aim for a perfectly uniform shape; rustic is beautiful. If the dough resists stretching, let it rest for a few minutes.
- Add Toppings: Carefully transfer the parchment paper with the pizza base onto your preheated baking sheet or pizza peel. Add your sauce, cheese, and toppings. Be mindful not to overload the crust, as this can lead to a soggy bottom.
- Bake: Slide the pizza directly onto the preheated pizza stone/steel or bake on the preheated baking sheet. Bake for 10-15 minutes, or until the crust is golden brown, puffed, and the cheese is bubbly and slightly caramelized.
- Rest and Serve: Remove the pizza from the oven and let it rest for a minute or two before slicing. This allows the crust to set slightly and prevents toppings from sliding off.
Around Wheat free, 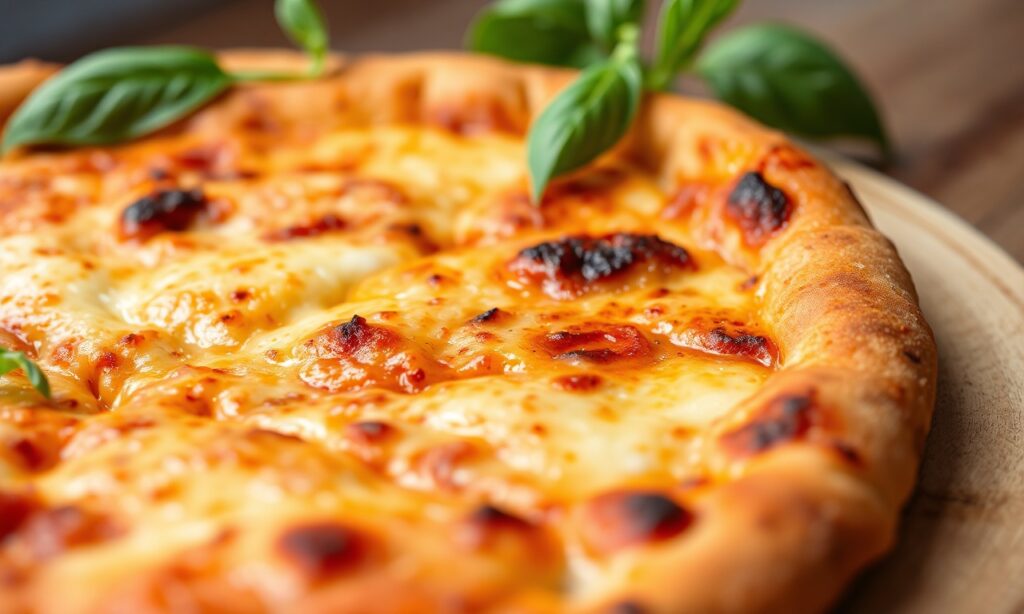
Mastering the Art of Wheat-Free Crust Texture
Regarding Wheat free, Achieving that coveted texture – the satisfying chew, the crisp exterior, and the absence of that dreaded “gummy” quality – requires a nuanced understanding of how gluten-free ingredients behave. It’s not just about the recipe; it’s about the interplay of moisture, heat, and specific binders.
When it comes to Wheat free, The hydration level, as mentioned, is a critical dial. For many wheat-free flour blends, a hydration of 80-90% (by weight of the flour) is often necessary. This might sound alarmingly wet, but it’s essential for creating a pliable dough that can hydrate the flours and starches properly. The psyllium husk gel, in particular, contributes significantly to this moisture retention and gelatinization, which is key to a tender crumb. If your dough feels too dry, the resulting crust will be brittle and crumbly. Conversely, if it’s excessively wet and unmanageable, you might need to slightly increase your flour blend or opt for a more absorbent binder.
In the context of Wheat free, The role of binders cannot be overstated. While xanthan gum is a common go-to, its overuse can lead to a rubbery texture. Psyllium husk, especially whole husks, is a superior binder for pizza crusts because it absorbs water to form a gel that provides structure and elasticity without making the dough overly gummy. Research published in the journal *Food Hydrocolloids* highlights how psyllium can improve dough rheology and the textural properties of gluten-free baked goods by forming a cohesive network that mimics gluten. Studies have shown that using a combination of psyllium husk and a small amount of xanthan gum can yield optimal results, offering both structure and a pleasant chew.
Around Wheat free, The baking process itself is another crucial element. A very hot oven is non-negotiable for achieving a crisp crust. This high heat causes rapid evaporation of moisture from the surface of the dough, creating that desirable crispness before the interior overcooks. Preheating your baking surface – whether it’s a pizza stone, steel, or even a heavy-duty baking sheet – is equally important. This ensures an immediate transfer of heat to the base of the pizza, promoting a well-baked bottom crust.
Regarding Wheat free, [TIP]Expert Insight: For an even crispier crust, consider par-baking the dough for 5-7 minutes before adding toppings. This allows the base to firm up and begin to brown, setting a foundation for a truly crisp texture. Remove the crust from the oven, add your sauce and toppings, and then return it to the oven to finish baking.
Troubleshooting Common Wheat-Free Pizza Crust Issues
When it comes to Wheat free, Even with the best intentions, you might encounter a few bumps on your wheat-free pizza-making journey. Understanding and addressing these common issues can save you frustration and lead to consistent success.
The Gummy Interior
In the context of Wheat free, This is perhaps the most frequent complaint. A gummy crust usually indicates that the starches haven’t been fully hydrated and cooked through, or that there’s an imbalance in the flour blend.
- Cause: Insufficient hydration, underbaking, or an excess of starchy flours without enough protein or binders.
- Solution: Ensure your dough has adequate hydration (aim for that 80-90% range). Bake at a high temperature for long enough to ensure the interior cooks through. If using a blend heavily reliant on starches, consider increasing the proportion of a more absorbent flour like sorghum or millet, or ensuring you have sufficient psyllium husk or xanthan gum. Pre-baking the crust can also help prevent gumminess.
The Crumbly, Dry Crust
Around Wheat free, This results in a pizza that falls apart when you try to pick it up, lacking that satisfying chew.
- Cause: Not enough moisture in the dough, insufficient binding agents, or overbaking.
- Solution: Increase the hydration of your dough. Make sure you are using adequate psyllium husk or xanthan gum. Ensure your dough is not overworked during mixing, as this can break down starches. Bake just until golden and cooked through, avoiding overbaking which will dry out the crust.
Lack of Rise and Density
Regarding Wheat free, Your pizza might be flat and dense, lacking the airy structure you’re aiming for.
- Cause: Inactive yeast, insufficient proofing time, or a flour blend that doesn’t support gas retention.
- Solution: Always check the expiry date of your yeast. Ensure your water temperature for activation is correct (lukewarm, not too hot or too cold). Allow ample time for both the bulk fermentation and proofing stages. The psyllium husk and xanthan gum play a role in trapping gases, so their presence is vital.
Tough or Rubbery Texture
This is often a sign of too much xanthan gum or over-processing the dough.
- Cause: Excessive xanthan gum or over-manipulation of the dough.
- Solution: Measure your xanthan gum accurately. While it’s a binder, more is not always better. If you are using psyllium husk as your primary binder, you may need very little or no xanthan gum. Remember that wheat-free dough does not require kneading like wheat dough; mix just until combined.
When it comes to Wheat free, [WARNING]Pro-Caution: When working with psyllium husk, it’s important to use whole husks rather than powder for the best gel consistency. Powdered psyllium can absorb water too quickly and create a very dense gel, which can be harder to incorporate evenly into the dough, potentially leading to pockets of gumminess.
Nutritional Insights and Customization
In the context of Wheat free, While the primary focus is on achieving a superior crust, understanding the nutritional profile of your wheat-free pizza can be beneficial. The exact nutritional values will vary significantly based on the specific flour blend used and the toppings. However, a typical wheat-free pizza crust, made with the recipe above, will offer a good source of fiber, particularly from the psyllium husk and sorghum flour.
- Fiber: Psyllium husk is an excellent source of soluble fiber, which can aid digestion and promote satiety. Sorghum flour also contributes a decent amount of dietary fiber.
- Carbohydrates: The primary macronutrient in pizza crust is carbohydrates, derived from the various flours.
- Protein: While wheat-free flours generally have lower protein content than wheat flour, blends with sorghum or millet can contribute some protein.
Customizing Your Blend
Around Wheat free, The beauty of wheat-free baking is the ability to tailor blends to your taste and dietary needs. Here are some ideas:
- Nutty Flavor: Incorporate a small percentage (e.g., 10-15%) of almond flour or finely ground oat flour (certified gluten-free) for added flavor and a slightly denser texture.
- Grain Variety: Experiment with millet flour, buckwheat flour, or teff flour for different flavor profiles and nutrient compositions. Ensure they are finely ground.
- Binder Adjustments: If you find xanthan gum causes an undesirable texture, you can try increasing the psyllium husk or exploring other natural binders like ground flaxseed (though this can impart a different flavor and texture). According to the gluten-free diet, a varied approach to binders can be key.
Regarding Wheat free, When making substitutions, it’s wise to make one change at a time and note the results. For example, if you replace 50g of rice flour with 50g of millet flour, observe how the dough handles and the final texture. This iterative process is how true mastery is achieved.
The Final Flourish: Elevating Your Wheat-Free Pizza Experience
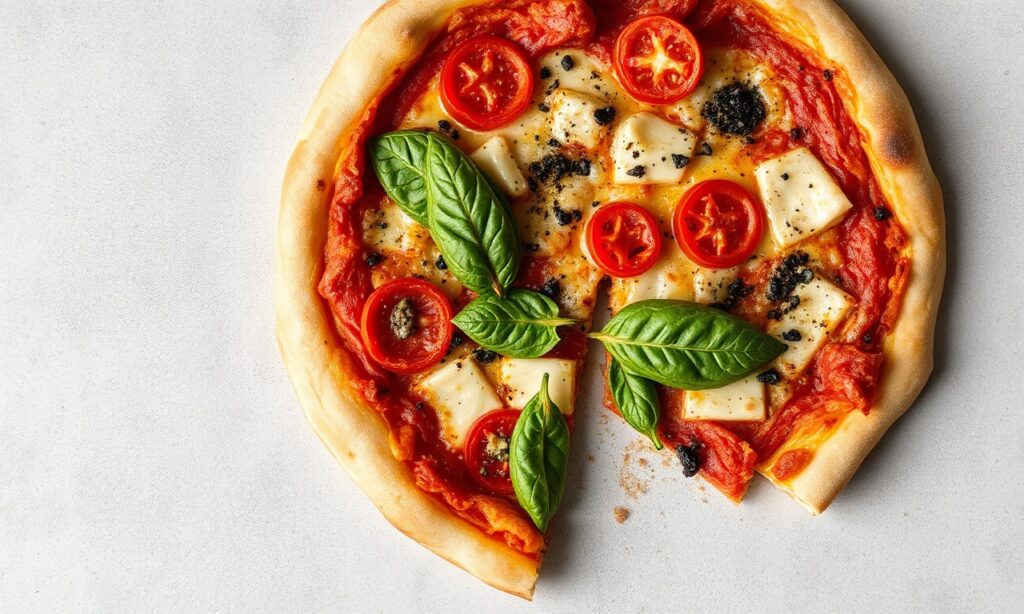
When it comes to Wheat free, Beyond the crust, the entire pizza experience can be optimized for wheat-free enjoyment. The quality of your sauce, the freshness of your toppings, and the type of cheese all play a role in the final symphony of flavors and textures.
- Sauce Selection: Opt for high-quality tomato sauces, ideally those with minimal added sugar and a rich, concentrated flavor. Homemade sauces are often the best, allowing you complete control over ingredients.
- Cheese Choices: Fresh mozzarella offers a wonderfully creamy melt. For a sharper flavor, consider a blend of mozzarella with a touch of Parmesan or Pecorino Romano. Dairy-free cheese alternatives have also come a long way; experiment to find one that melts well and suits your taste.
- Topping Ingenuity: Think about contrasting textures and flavors. Crispy prosciutto, caramelized onions, roasted vegetables, fresh arugula added after baking, or a drizzle of balsamic glaze can all elevate your pizza from good to exceptional.
- Herbs and Spices: Don’t underestimate the power of fresh herbs. Basil, oregano, and thyme, added during the last few minutes of baking or sprinkled on fresh, can impart vibrant aromas and flavors. A sprinkle of red pepper flakes can add a pleasant warmth.
In the context of Wheat free, Ultimately, the most important ingredient in any wheat-free pizza is the care and attention you put into its creation. By understanding the principles of gluten-free baking, embracing the right ingredients, and employing these trusted techniques, you can consistently create wheat-free pizzas that are not just a substitute, but a destination in themselves. The joy of a perfectly crafted slice, devoid of compromise, is truly a remarkable culinary achievement.
Frequently Asked Questions
Q1: Can I use a pre-made gluten-free flour blend for this recipe?
Around Wheat free, While some pre-made blends might work, this recipe is specifically formulated with a particular ratio of flours and binders for optimal results. Pre-made blends can vary significantly in their composition, and may not contain the necessary binders like psyllium husk or xanthan gum in the required amounts. If you do use a blend, check its ingredients carefully and be prepared to adjust the liquid content. It’s generally recommended to use the specific blend outlined for the best chance of success.
Q2: Why is my wheat-free pizza crust not browning properly?
Regarding Wheat free, Several factors can contribute to a pale crust. Ensure your oven is reaching its highest possible temperature and that your baking surface is thoroughly preheated. The type of flour blend also plays a role; some starches brown less readily than others. Adding a small amount of sugar to your dough can aid in caramelization. Baking at a high temperature for a sufficient duration is key. If it’s still not browning, consider adding a small amount of tapioca starch or potato starch to your blend, as these tend to brown more easily.
Q3: How can I make my wheat-free pizza crust crispy on the bottom?
When it comes to Wheat free, Achieving a crispy bottom crust is all about intense heat. Use a pizza stone or steel preheated in the oven for at least 30-60 minutes at the highest temperature possible. Sliding the pizza directly onto this hot surface ensures immediate heat transfer. Alternatively, a heavy-duty baking sheet, preheated, can also yield good results. Ensure there isn’t too much moisture from the sauce or toppings, which can steam the crust instead of crisping it. Pre-baking the dough for a few minutes before adding toppings can also create a firmer, crispier base.
Q4: Can I freeze wheat-free pizza dough?
In the context of Wheat free, Yes, wheat-free pizza dough can be frozen, but with some considerations. It’s best to freeze it after the first rise (bulk fermentation) or after shaping it into individual pizza bases. Ensure it’s well-wrapped to prevent freezer burn. When ready to use, thaw it in the refrigerator overnight, then let it come to room temperature for about an hour before shaping or baking. The texture might be slightly different after freezing, but it’s generally a workable option for meal prep.
Q5: What is the difference between psyllium husk and psyllium husk powder?
Around Wheat free, Psyllium husk refers to the outer coating of the psyllium seed, while psyllium husk powder is the husk that has been ground into a fine powder. For baking, especially for creating a gel that mimics gluten’s binding properties, whole psyllium husks are generally preferred. They absorb water more slowly and predictably, forming a more robust gel structure that lends better elasticity and chew to wheat-free dough. Psyllium powder can absorb water very rapidly, potentially leading to a gummy or overly dense dough if not handled carefully.
See also: Wheat free


