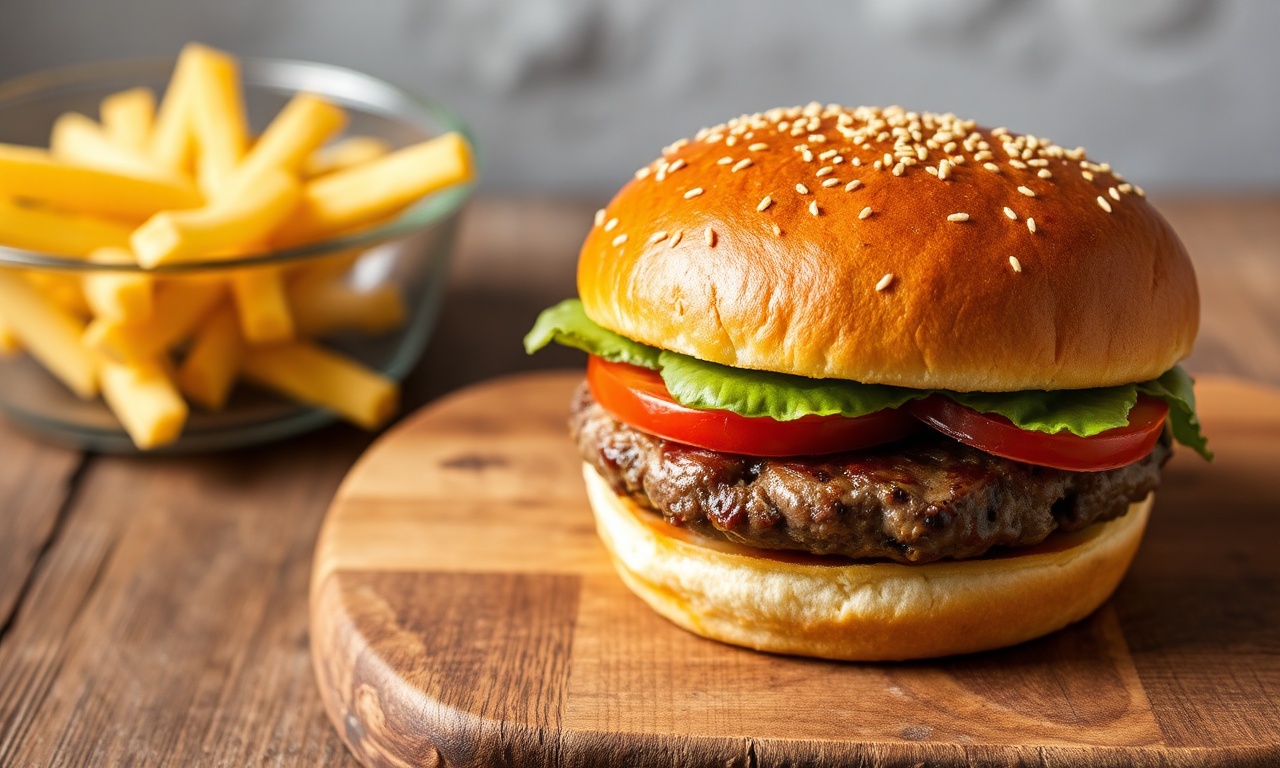
Homemade Hamburger: The Humble Hamburger Bun: More Than Just a Vehicle
When it comes to Homemade Hamburger, The humble hamburger bun. For too long, it has been relegated to a mere supporting player, a structural necessity rather than a culinary star. We obsess over the patty, the toppings, the perfect char, yet the vessel that holds it all together often receives only a cursory glance, or worse, a grudging acceptance of something mass-produced and bland. This is a culinary oversight of monumental proportions. A truly exceptional burger experience begins, and is profoundly elevated, by the bun. It’s not just about holding the ingredients; it’s about contributing texture, flavor, and aroma, creating a harmonious bite that delights the senses.
- Homemade Hamburger: The Humble Hamburger Bun: More Than Just a Vehicle
- Why Homemade Hamburger Matters: The Science Behind the Perfect Crumb: Gluten, Yeast, and Hydration
- Homemade Hamburger in Essential Ingredients and Precise Measurements: The Baker’s Palette
- The Foundation: Flour and Yeast
- Enrichment and Moisture: The Tenderizing Agents
- Optional Enhancements: For That Extra Polish
- The Masterful Method: From Dough to Divine Buns
- Step 1: Activating the Yeast and Mixing the Dough
- Step 2: Kneading for Optimal Gluten Development
- Step 3: The Crucial First Rise (Bulk Fermentation)
- Step 4: Shaping the Buns: Precision and Uniformity
- Step 5: The Second Rise (Proofing)
- Step 6: Baking to Golden Perfection
- Nutritional Insights: The Wholesome Foundation
- Elevating Your Buns: Expert Tips for Restaurant-Quality Results
- Frequently Asked Questions
- Q1: My hamburger buns are coming out dry and crumbly. What am I doing wrong?
- Q2: Why are my buns not rising properly?
- Q3: How can I achieve that classic bakery-style glossy finish?
- Q4: Can I make these buns ahead of time?
- Q5: What is the difference between using all-purpose flour and bread flour for hamburger buns?
The pursuit of the perfect homemade hamburger bun is not a trivial endeavor; it is an art form, a science, and a deeply satisfying journey for any home baker who yearns to transform their backyard barbecue into a gourmet event.
In the context of Homemade Hamburger, The true measure of a great burger lies not just in the patty, but in the silken embrace of its bun.
Around Homemade Hamburger, This article demystifies the process, revealing the polished baker’s secrets that transform simple flour and yeast into golden, cloud-like spheres of pure delight. We explore the science of gluten development, the nuances of proofing, and the subtle art of achieving that perfect balance between a tender crumb and a resilient crust. Forget the dry, crumbly disappointments of the past. Prepare to create hamburger buns that will have your guests — and your own taste buds — singing.
Key Takeaways:
- The bun is a critical component, not an afterthought, in the burger experience.
- Understanding gluten development is paramount for achieving a tender yet structured crumb.
- Precise ingredient temperature and proofing times are non-negotiable for optimal results.
- Baking techniques, such as steam, can dramatically improve crust texture and crumb moisture.
Why Homemade Hamburger Matters: The Science Behind the Perfect Crumb: Gluten, Yeast, and Hydration
At its core, a superior homemade hamburger bun is proof of the intelligent manipulation of flour, water, yeast, and fat. The magic begins with gluten development. When flour, primarily wheat flour, is mixed with water, two proteins – glutenin and gliadin – absorb the liquid and begin to form a network of elastic strands: gluten. This network is the backbone of our bun, trapping the gases produced by yeast during fermentation, which ultimately creates the airy, light texture we desire. Overworking the dough can lead to excessively tough buns, while underworking results in a crumbly, uninspired texture. The goal is to develop just enough gluten for structure and chew, without sacrificing tenderness.
Regarding Homemade Hamburger, Yeast, whether active dry, instant, or fresh, is the leavening agent. It consumes sugars in the dough and releases carbon dioxide gas and alcohol. This gas expansion is what gives the bun its rise. The temperature of the liquid used to activate the yeast is crucial. Water that is too hot can kill the yeast, while water that is too cool will result in sluggish fermentation. For active dry yeast, a temperature of around 105-115°F (40-46°C) is ideal. Instant yeast can often be mixed directly with dry ingredients, and its activation is driven by the warmth of the dough itself.
When it comes to Homemade Hamburger, Hydration – the ratio of water to flour – plays an equally vital role. A higher hydration dough will generally yield a more tender and moist crumb, but it can be trickier to handle. For a classic, soft hamburger bun, a hydration level typically ranging from 60% to 70% is a good starting point. This means that for every 100 grams of flour, you’ll use 60 to 70 grams of water (or liquid). Fat, often in the form of butter or oil, is introduced to tenderize the crumb, enrich the flavor, and extend the shelf life of the buns by inhibiting gluten formation and locking in moisture.
In the context of Homemade Hamburger, 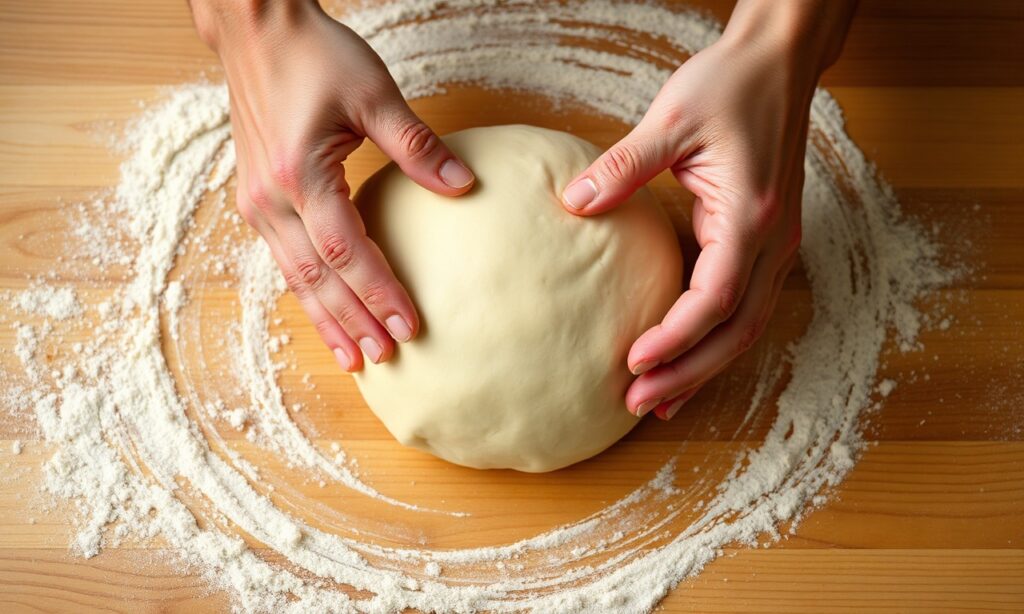
Homemade Hamburger in Essential Ingredients and Precise Measurements: The Baker’s Palette
Achieving bakery-quality homemade hamburger buns hinges on the quality and precision of your ingredients. While the list may seem simple, the details matter.
The Foundation: Flour and Yeast
- All-Purpose Flour: While bread flour can be used for a chewier bun, for that quintessential soft, pillowy texture, all-purpose flour is the preferred choice. Its moderate protein content provides sufficient gluten development without becoming overly tough. Aim for around 500 grams (approximately 4 cups) for a batch of 8-10 buns.
- Yeast: As mentioned, the type of yeast will dictate its activation. Active dry yeast requires proofing in warm liquid, while instant yeast can often be added directly to dry ingredients. For a recipe yielding 8-10 buns, you’ll typically need about 2 ¼ teaspoons (7 grams) of either.
- Sugar: A small amount of sugar not only sweetens the buns slightly but also provides essential food for the yeast, kickstarting fermentation and contributing to a beautifully golden crust. 1-2 tablespoons is usually sufficient.
- Salt: Crucial for flavor and controlling yeast activity, 1 to 1 ½ teaspoons of fine sea salt is recommended.
Enrichment and Moisture: The Tenderizing Agents
- Milk: Whole milk, warmed, adds richness, tenderness, and a subtle sweetness that contributes to a superior flavor profile and a softer crumb. Approximately 240-280 ml (1 cup to 1 ¼ cups) will be needed, depending on the flour and other ingredients.
- Unsalted Butter: Softened, unsalted butter is key for tenderness and a rich mouthfeel. It coats the flour particles, inhibiting excessive gluten development. 50-60 grams (¼ cup) is a good starting point.
- Eggs: A large egg, at room temperature, acts as a binder, adds richness, color, and helps create a slightly more structured yet still tender crumb. One egg is typically sufficient for this quantity.
Optional Enhancements: For That Extra Polish
- Egg Wash: A mixture of one egg yolk beaten with a tablespoon of milk or water, brushed on before baking, will yield a glossy, golden-brown finish.
- Sesame Seeds: Toasted or untoasted, these add a classic flavor and visual appeal.
The Masterful Method: From Dough to Divine Buns
Around Homemade Hamburger, Crafting these ethereal buns is a step-by-step process that rewards patience and attention to detail.
Step 1: Activating the Yeast and Mixing the Dough
- Activate Yeast (if using Active Dry): In a small bowl, combine the warm milk (ensure it’s between 105-115°F / 40-46°C), sugar, and active dry yeast. Stir gently and let it sit for 5-10 minutes until it becomes foamy and bubbly, indicating the yeast is alive and active. If using instant yeast, you can skip this step and add it directly with the flour.
- Combine Wet Ingredients: In a large mixing bowl (or the bowl of your stand mixer), whisk together the activated yeast mixture (or warm milk if using instant yeast), the room-temperature egg, and the softened butter.
- Add Dry Ingredients: In a separate bowl, whisk together the all-purpose flour and salt. Gradually add the dry ingredients to the wet ingredients in the mixing bowl.
- Initial Mix: Using a dough hook attachment on your stand mixer or a sturdy spoon, begin to mix the ingredients until a shaggy dough forms.
Step 2: Kneading for Optimal Gluten Development
- Kneading: If using a stand mixer, continue to knead on medium-low speed for 8-10 minutes, or until the dough is smooth, elastic, and pulls away from the sides of the bowl. If kneading by hand, turn the dough out onto a lightly floured surface and knead for 10-15 minutes, pushing, folding, and turning the dough until it achieves the desired elasticity. The dough should feel soft and slightly tacky, but not sticky.
Step 3: The Crucial First Rise (Bulk Fermentation)
- First Rise: Lightly grease a clean bowl with oil. Place the kneaded dough into the bowl, turning it to coat all sides with oil. Cover the bowl tightly with plastic wrap or a damp kitchen towel.
- Fermentation Environment: Let the dough rise in a warm, draft-free place for 1 to 1.5 hours, or until it has doubled in size. The ideal temperature for fermentation is around 75-80°F (24-27°C). A slightly cooler environment will result in a slower rise, but can develop more complex flavors.
Step 4: Shaping the Buns: Precision and Uniformity
- Degassing: Once doubled, gently punch down the dough to release the accumulated gases.
- Dividing: Turn the dough out onto a lightly floured surface and divide it into 8-10 equal portions (for standard-sized buns). Weighing each portion will ensure uniformity.
- Shaping: For each portion, gently flatten it into a disc. Then, cup your hands around the dough and rotate it, tucking the edges underneath to create a taut, smooth surface. Aim for a round, slightly domed shape. Place the shaped buns on a baking sheet lined with parchment paper, leaving about 2-3 inches of space between them to allow for expansion.
Step 5: The Second Rise (Proofing)
- Second Rise: Lightly cover the shaped buns with plastic wrap or a damp towel. Let them rise again in a warm place for 30-45 minutes, or until they appear noticeably puffed up and have nearly doubled in size. They should look soft and pillowy.
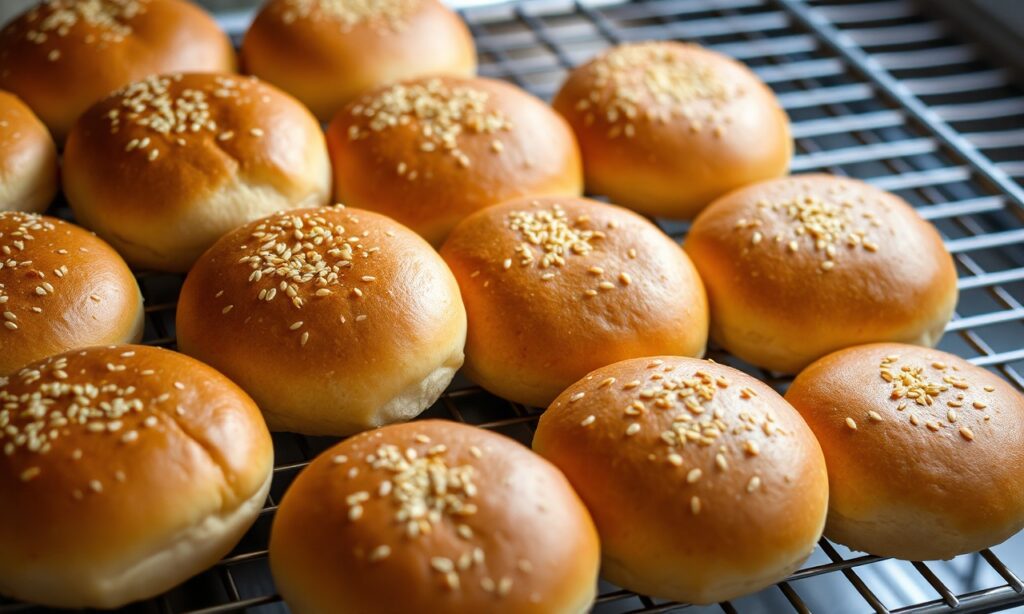
Step 6: Baking to Golden Perfection
- Preheat Oven: While the buns are proofing, preheat your oven to 375°F (190°C). For an extra-crisp crust and moist interior, you can place a shallow pan of hot water on the bottom rack of your oven to create steam.
- Egg Wash (Optional): If using an egg wash, gently brush the tops of the risen buns with the mixture.
- Baking: Carefully place the baking sheet into the preheated oven. Bake for 15-20 minutes, or until the buns are golden brown on top and sound hollow when tapped on the bottom.
- Cooling: Immediately remove the buns from the baking sheet and place them on a wire rack to cool completely. This prevents the bottoms from becoming soggy.
Nutritional Insights: The Wholesome Foundation
While the primary joy of homemade hamburger buns is their taste and texture, understanding their nutritional profile offers a complete picture. A typical homemade hamburger bun, made with the ingredients outlined above and yielding 8 portions, will contain approximately:
- Calories: 150-180 kcal
- Protein: 4-5 g
- Fat: 5-7 g (with a good portion from healthy butter)
- Carbohydrates: 25-30 g
- Fiber: 1-2 g
- Sugar: 3-5 g
Regarding Homemade Hamburger, Keep in mind that these are approximate values and can vary based on the exact quantities of ingredients used, particularly the type and amount of fat and sugar. The use of whole milk and butter contributes to a richer nutrient profile compared to commercially produced buns, which often rely on less wholesome fats and additives.
Elevating Your Buns: Expert Tips for Restaurant-Quality Results
Beyond the fundamental recipe, several nuanced techniques can elevate your homemade hamburger buns from excellent to truly extraordinary. These are the secrets the pros employ.
The Art of the Dough:
- Autolyse: For an even more tender crumb and easier dough handling, consider an autolyse. This involves mixing just the flour and water (and sometimes yeast) and letting it rest for 20-30 minutes before adding salt and fat. This allows the flour to fully hydrate and gluten to begin developing without much effort, resulting in a smoother, more extensible dough.
- Cold Fermentation: For a deeper, more complex flavor, after the first rise, you can punch down the dough, shape it into a ball, place it in a lightly oiled bowl, cover tightly, and refrigerate for 12-24 hours. This slow, cold fermentation allows enzymes to break down starches and proteins, creating a richer taste. Bring the dough back to room temperature for about an hour before shaping.
Baking Nuances:
- Steam is Your Friend: As mentioned, introducing steam into the oven during the initial stages of baking is critical for achieving a soft, slightly chewy crust that doesn’t harden too quickly. A cast-iron skillet filled with boiling water placed on the bottom rack works wonders. Alternatively, spritzing the oven walls with water a couple of times during the first 5-7 minutes of baking can also help.
- Don’t Over-Proof: While a good rise is essential, over-proofing can lead to a collapsed bun in the oven. The buns should look plump and airy, but not so inflated that they seem about to burst.
- Gentle Handling: Throughout the process, from shaping to transferring to the oven, handle the dough with care. Rough handling can deflate the air pockets that have painstakingly formed.
Flavor Enhancements:
- Garlic or Herb Infusion: For a savory twist, you can knead a tablespoon or two of finely minced fresh herbs (like rosemary or chives) or a teaspoon of garlic powder into the dough during the final stages of kneading.
- Cheese-Filled Buns: For a decadent treat, flatten small portions of dough, place a cube of your favorite cheese (cheddar, Gruyère, or even cream cheese) in the center, and carefully enclose it, shaping into a bun.
Frequently Asked Questions
Q1: My hamburger buns are coming out dry and crumbly. What am I doing wrong?
When it comes to Homemade Hamburger, Dry and crumbly buns are often a result of insufficient fat, too much flour, or overbaking. Ensure you are using the correct amount of butter and milk. Accurate measurement of flour is crucial; using a kitchen scale is highly recommended. Avoid adding too much extra flour during kneading. Most importantly, pay close attention to baking time; overbaking is the most common culprit for dryness.
Q2: Why are my buns not rising properly?
In the context of Homemade Hamburger, Lack of rise can be due to several factors. Ensure your yeast is fresh and active. If using active dry yeast, confirm the water temperature was within the 105-115°F (40-46°C) range for activation. A cool environment can also slow down fermentation. Make sure your dough is rising in a warm, draft-free spot. Over-salting the dough can also inhibit yeast activity.
Q3: How can I achieve that classic bakery-style glossy finish?
Around Homemade Hamburger, The glossy finish is achieved through an egg wash. Whisk together one large egg yolk with about 1 tablespoon of milk or water. Gently brush this mixture over the tops of the buns just before they go into the oven. For an even more intense shine, you can brush them again halfway through baking. Ensure the buns are adequately proofed but not over-proofed, as a too-inflated surface can lead to the wash cracking.
Q4: Can I make these buns ahead of time?
Yes, homemade hamburger buns can be made ahead. Once completely cooled, store them in an airtight container or a resealable plastic bag at room temperature for up to 2-3 days. For longer storage, they can be frozen. Wrap them tightly in plastic wrap, then in foil or a freezer bag. They will keep for up to 3 months and can be thawed at room temperature or gently warmed in a low oven.
Q5: What is the difference between using all-purpose flour and bread flour for hamburger buns?
Regarding Homemade Hamburger, All-purpose flour has a moderate protein content (around 10-12%), which yields a tender, soft crumb that is ideal for classic hamburger buns. Bread flour has a higher protein content (around 12-14%), which develops more gluten, resulting in a chewier, more structured bun. If you prefer a very soft, almost cake-like interior, stick with all-purpose flour. For a bun with a bit more chew and resilience, bread flour is a good option.
Homemade Hamburger remains one of the most important topics in this space. To understand Homemade Hamburger deeply, readers should keep up with the latest developments around Homemade Hamburger.
Homemade Hamburger remains one of the most important topics in this space. To understand Homemade Hamburger deeply, readers should keep up with the latest developments around Homemade Hamburger.
See also: Homemade Hamburger


