Swiss Roll: A Culinary Icon of Elegance and Simplicity
Did you know that the humble Swiss roll, a seemingly straightforward jelly roll cake, has a surprisingly complex history and a significant place in the pantheon of beloved desserts? Its deceptive simplicity belies a delicate balance of textures and flavors that, when executed correctly, can transport the diner to a realm of pure confectionary delight. Far from being just another sweet treat, the Swiss roll represents a culinary tradition that spans continents, evolving from its likely European origins into a universally adored indulgence. Its adaptability, from classic cream fillings to exotic fruit compotes, makes it a perennial favorite for both home bakers and professional patissiers.
- Swiss Roll: A Culinary Icon of Elegance and Simplicity
- The Science and Art of the Perfect Swiss Roll Sponge
- The Heart of the Matter: Luscious Fillings and Frostings
- Assembling Your Masterpiece: The Art of the Roll
- Nutritional Snapshot: A Moment of Indulgence
- Expert Pro-Tips for Elevating Your Swiss Roll
- The Enduring Appeal of the Swiss Roll
- Frequently Asked Questions
This article demystifies the art of the Swiss roll, offering a comprehensive guide that explore its creation, its nuances, and the reasons why it remains an utterly essential dessert for any discerning palate.
The true magic of a Swiss roll lies not in complexity, but in the perfect execution of simple elements, transforming basic ingredients into a symphony of texture and taste.
The journey of the Swiss roll is as fascinating as its taste. While its exact origins are debated, historical evidence points towards its development in Europe, with variations appearing in Austria, England, and France by the mid-19th century. The name itself, “Swiss roll,” is somewhat of a misnomer, as its true genesis isn’t definitively linked to Switzerland. However, its popularity surged, cementing its place in baking repertoires worldwide. Today, it’s a staple in many cultures, often adapted with local flavors and ingredients, proof of its universal appeal and inherent versatility.
The Science and Art of the Perfect Swiss Roll Sponge
The foundation of any exceptional Swiss roll is its sponge cake. This isn’t just any cake; it needs to be light, airy, and incredibly pliable to allow for a tight, yet crack-free, roll. The magic lies in the careful balance of ingredients and technique. A classic Swiss roll sponge typically relies on a higher ratio of eggs to flour, with the eggs being whipped to incorporate significant air, providing the cake’s signature lift and delicate crumb. Research suggests that the protein structure of whipped eggs contributes to the porous and elastic nature of sponge cakes, making them ideal for rolling without fracturing. The fat content is usually lower than in a standard butter cake, which contributes to its flexibility.
Baking time and temperature are absolutely critical; an overbaked sponge will crack, while an underbaked one will be too dense and sticky.
A key factor in achieving the correct texture is the aeration of the eggs. Whole eggs or separated eggs can be used. When using separated eggs, the whites are often whipped to stiff peaks and then gently folded into the batter. This process, known as the “joconde” sponge method, is crucial for achieving the characteristic lightness. The precise folding technique ensures that the air incorporated remains trapped, leading to a tender and resilient crumb.
Essential Ingredients for the Perfect Sponge
To achieve that signature lightness and pliability, precise measurements and high-quality ingredients are paramount. The following list provides the foundation for a classic vanilla Swiss roll sponge.
- Large Eggs: 4, at room temperature. Room temperature eggs whip to a greater volume, crucial for aeration.
- Granulated Sugar: 120g (approximately 2/3 cup). This not only sweetens but also stabilizes the egg foam.
- All-Purpose Flour: 100g (approximately 3/4 cup plus 2 tablespoons). Sifted to remove lumps and ensure even distribution.
- Vanilla Extract: 1 teaspoon. For that classic, comforting aroma and flavor.
- Salt: Pinch. Enhances the overall flavor profile.
Mastering the Technique: From Batter to Bake
The process of creating the Swiss roll sponge is as much about finesse as it is about following instructions. Each step is designed to build structure and maintain lightness.
- Preheat and Prepare: Preheat your oven to 180°C (350°F). Line a 30×40 cm (12×16 inch) baking sheet with parchment paper, ensuring the paper extends slightly over the edges to aid in lifting the cake. Grease the parchment paper lightly.
- Whip the Eggs and Sugar: In a large, clean bowl, whisk the eggs and sugar together. Place the bowl over a bain-marie (a bowl set over simmering water, ensuring the bottom of the bowl doesn’t touch the water). Whisk continuously until the mixture is warm to the touch (about 50-55°C or 120-130°F) and the sugar has dissolved completely. This step, known as tempering, helps the eggs achieve maximum volume when whipped.
- Achieve Ribbon Stage: Remove the bowl from the heat and, using an electric mixer on high speed, beat the egg and sugar mixture for 8-10 minutes. The mixture should become very pale, thick, and form a “ribbon” that slowly disappears when the beaters are lifted. This is the critical ribbon stage, indicating sufficient aeration.
- Incorporate Vanilla and Salt: Gently stir in the vanilla extract and salt.
- Fold in the Flour: Sift the flour over the egg mixture in three additions. Gently fold the flour into the batter using a large spatula, being careful not to deflate the airy egg foam. Use an under-and-over motion, scraping the bottom of the bowl and bringing the batter up and over. Stop folding as soon as no dry streaks of flour remain. Overmixing will toughen the cake and reduce its elasticity.
- Bake to Perfection: Pour the batter evenly onto the prepared baking sheet, spreading it with an offset spatula to create a uniform layer. Bake for 10-12 minutes, or until the cake is lightly golden and springs back when gently touched. Do not overbake, as this will lead to cracking.
- The Crucial Roll: While the cake is still warm, immediately invert it onto a clean kitchen towel that has been lightly dusted with powdered sugar. Carefully peel off the parchment paper. Starting from one of the shorter ends, tightly roll up the cake with the parchment paper still inside, or the clean towel. Let it cool completely in this rolled state. This pre-rolling while warm is essential for preventing cracks when you eventually fill and re-roll it.

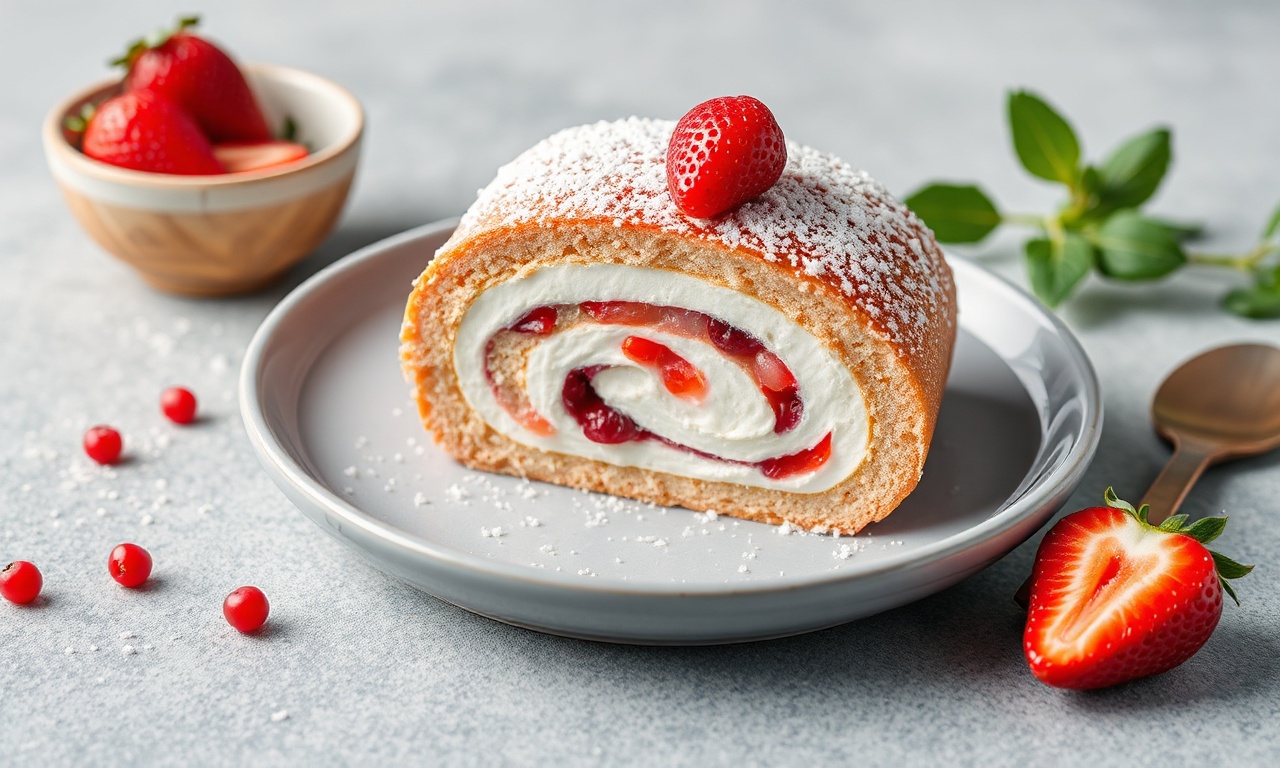
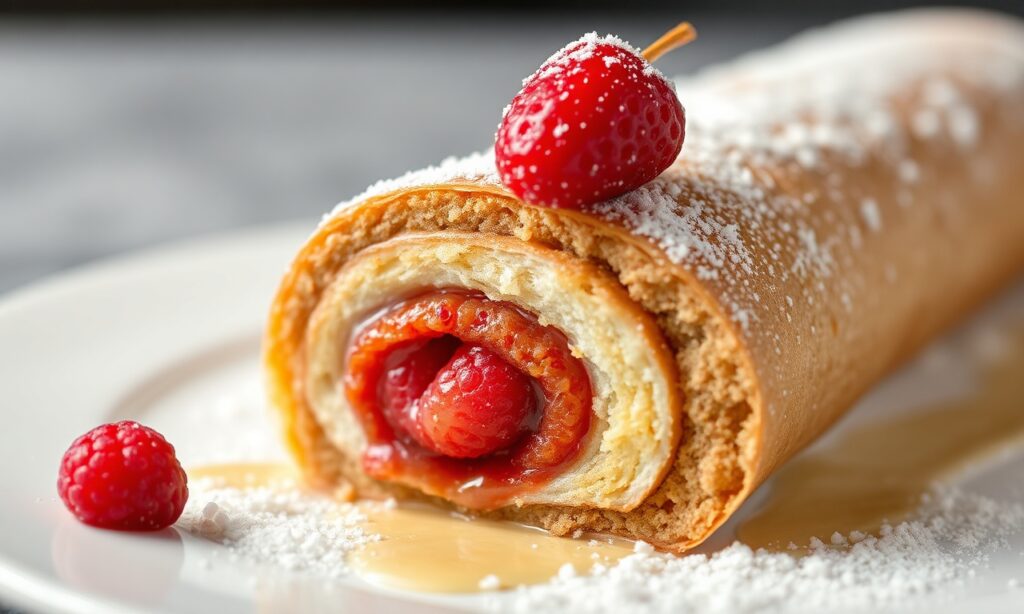
The Heart of the Matter: Luscious Fillings and Frostings
The sponge is the canvas, but the filling and frosting are the masterpiece. The choice of filling can transform a simple Swiss roll into a decadent indulgence or a refreshing treat. For a classic experience, whipped cream is paramount. Its lightness complements the delicate sponge beautifully. However, the possibilities are nearly endless, allowing for immense creativity and personalization.
The consistency of the filling is key. It needs to be spreadable without being too runny, which could cause the roll to collapse. A stable whipped cream, perhaps stabilized with a touch of gelatin or mascarpone, is ideal. Fruit-based fillings, such as raspberry coulis or lemon curd, offer a delightful tartness that cuts through the sweetness of the cake. For a richer experience, ganache or pastry cream can be employed, though care must be taken to ensure they are not too warm or too firm, which could also compromise the structural integrity of the roll.
Classic Whipped Cream Filling: A Timeless Choice
For many, the quintessential Swiss roll features a cloud-like whipped cream filling. Achieving a perfectly stable and delicious whipped cream requires attention to detail.
- Heavy Cream: 300ml (approximately 1 1/4 cups), very cold. The fat content is crucial for whipping.
- Powdered Sugar: 50g (approximately 1/3 cup), sifted. Provides sweetness and helps stabilize.
- Vanilla Extract: 1 teaspoon. For flavor.
Preparation of Whipped Cream:
- Chill Everything: Ensure your cream, bowl, and whisk attachments are thoroughly chilled. This helps the cream whip faster and achieve better volume.
- Whip to Soft Peaks: Pour the cold heavy cream into the chilled bowl. Begin whipping on medium speed until soft peaks form – the peaks will curl over when the beaters are lifted.
- Add Sugar and Vanilla: Gradually add the sifted powdered sugar and vanilla extract.
- Whip to Stiff Peaks: Continue whipping on medium-high speed until stiff peaks form. The peaks should stand straight up when the beaters are lifted. Be careful not to over-whip, as this can turn the cream into butter.
Beyond Cream: Creative Filling Ideas
The beauty of the Swiss roll lies in its adaptability. Here are a few ideas to inspire your next creation:
- Chocolate Ganache: A rich, dark chocolate ganache provides an intense flavor contrast.
- Fruit Curds: Lemon, lime, or passion fruit curds offer a bright, tangy counterpoint to the sweet sponge.
- Jam and Mascarpone: A layer of your favorite jam topped with a light mascarpone cream creates a delightful texture and flavor combination.
- Coffee or Mocha Cream: Infuse the whipped cream with espresso powder or coffee extract for a sophisticated twist.
Assembling Your Masterpiece: The Art of the Roll
This is perhaps the most nerve-wracking part for many home bakers, but with patience and the right technique, it’s entirely achievable. The cake should be completely cool before you attempt to unroll and fill it. This ensures it holds its shape and doesn’t become a sticky mess.
Once cooled, gently unroll the cake. If you rolled it with the towel, carefully remove the towel. You should have a flexible, porous sponge. Spread your chosen filling evenly over the surface of the cake, leaving a small border (about 1-2 cm or 1/2 inch) along the edge furthest from you. This border will help prevent the filling from oozing out excessively when you roll it up.
Now, with gentle but firm pressure, begin to roll the cake up again, starting from the edge closest to you. The pre-rolling step is crucial here; it has already trained the cake to bend. As you roll, try to keep the tension consistent. If you encounter any small cracks, don’t panic. These will be hidden by frosting or a dusting of powdered sugar.
Once rolled, you can either frost the entire roll or simply dust it with powdered sugar for a more rustic presentation. For frosting, a simple buttercream or a glaze works beautifully. Ensure the frosting is at a spreadable consistency – not too stiff, not too runny. Using an offset spatula, gently spread the frosting around the entire roll, smoothing it as much as possible. For a classic finish, you can drag the tines of a fork across the frosting to create a ridged effect.
Nutritional Snapshot: A Moment of Indulgence
While the Swiss roll is undeniably a treat, understanding its nutritional profile can help in mindful enjoyment. A typical serving (one slice) of a classic Swiss roll made with a vanilla sponge and whipped cream filling may contain approximately:
- Calories: 250-350 kcal
- Carbohydrates: 30-40g
- Sugar: 20-30g
- Fat: 12-18g
- Protein: 3-5g
These figures are approximate and will vary significantly based on the specific ingredients used, the size of the serving, and the type and amount of filling and frosting. For instance, a chocolate ganache filling will increase the fat and calorie content considerably compared to a fruit-based filling. Keep in mind that desserts like the Swiss roll are meant to be enjoyed as part of a balanced diet, providing moments of pleasure and celebration.
Expert Pro-Tips for Elevating Your Swiss Roll
To truly master the Swiss roll and achieve professional-level results, consider these expert tips:
- Room Temperature Ingredients: Always ensure your eggs and dairy for the sponge and filling are at room temperature (unless otherwise specified, like for the cream). This promotes better emulsion and aeration.
- Sift, Sift, Sift: Sifting your flour multiple times is not just about removing lumps; it aerates the flour, contributing to a lighter cake.
- Gentle Folding is Key: The folding technique for incorporating dry ingredients into a whipped egg base is critical. Aggressive mixing will deflate the batter, resulting in a dense cake.
- The Parchment Paper Trick: Always line your baking sheet with parchment paper. It’s essential for easy removal of the cake and prevents sticking. Lightly greasing the parchment can add an extra layer of insurance.
- Don’t Overbake: A slightly underbaked sponge is preferable to an overbaked one for a Swiss roll, as it will be more pliable. It should spring back lightly when touched.
- Cooling is Crucial: Allow the cake to cool completely before unrolling and filling. This prevents the filling from melting and the cake from tearing.
- Tightly Roll for Elegance: When re-rolling, apply consistent, firm pressure. This ensures a neat spiral and prevents air pockets.
The Enduring Appeal of the Swiss Roll
The Swiss roll, in its elegant simplicity, is more than just a dessert; it’s proof of the power of fundamental baking techniques. Its ability to be both comforting and sophisticated, adaptable and classic, secures its place as an essential item in any baker’s repertoire. Whether served at a child’s birthday party or a sophisticated afternoon tea, the Swiss roll delivers a guaranteed smile and a moment of pure, unadulterated joy. It’s a dessert that invites creativity, celebrates tradition, and, most importantly, tastes absolutely divine. The next time you crave a treat that is both visually appealing and gastronomically satisfying, turn to the enduring charm of the Swiss roll.
Frequently Asked Questions
What is the best way to prevent my Swiss roll from cracking?
The most common reason for cracking is overbaking the sponge. Ensure you bake it just until it springs back to the touch, not until it’s fully set and dry. Rolling the cake while it’s still warm is also crucial; this trains the cake to bend without breaking. Ensure your ingredients, especially eggs, are at the right temperature for optimal aeration and structure.
Can I make a Swiss roll ahead of time?
Yes, you can. The sponge cake can be baked a day in advance, cooled completely, and then wrapped tightly in plastic wrap. Store it at room temperature. The filling can also be prepared separately and refrigerated. Assemble the cake just a few hours before serving for the best texture and freshness. If frosting, it’s best to frost it closer to serving time.
What kind of pan is best for baking a Swiss roll?
A rimmed baking sheet, typically around 30×40 cm (12×16 inches), is ideal. A jelly roll pan is specifically designed for this purpose. Ensure the pan is not too deep, as you want a thin, even layer of batter for optimal rolling.
How do I get a perfectly even layer of filling?
Use an offset spatula to spread the filling. Start from the center and work your way outwards, applying gentle, even pressure. Leave a small border along the edge furthest from you to prevent excessive oozing. For very soft fillings, chilling them slightly can make them easier to spread.
Are there gluten-free options for Swiss rolls?
Absolutely. Gluten-free Swiss rolls can be made by substituting a high-quality gluten-free flour blend for all-purpose flour. You may need to adjust the liquid content slightly, and some recipes might benefit from adding a binder like xanthan gum. The key is still achieving a light, airy sponge that can roll without crumbling.
See also: Swiss Roll


