
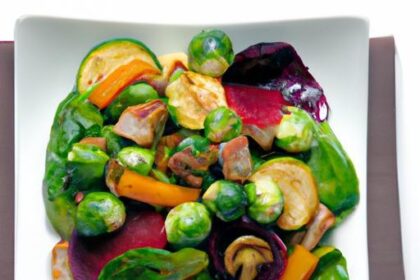
Gluten Free: The Universal Appeal of Pie and the Gluten Challenge
When it comes to Gluten Free, Pie, in its myriad forms, stands as a cornerstone of comfort food and celebratory tradition across cultures. From the humble apple pie gracing Thanksgiving tables to elegant fruit tarts gracing summer picnics, its universal appeal is undeniable. Yet, for a significant and growing portion of the global population, the joy of a perfectly baked pie has been marred by a persistent challenge: gluten. The elastic network formed by gluten proteins in traditional flour is what gives conventional pie crust its characteristic flakiness and structure, but its absence in gluten-free baking presents a formidable hurdle. Many home bakers have resigned themselves to crumbly, brittle, or even gummy textures when attempting gluten-free versions.
- Gluten Free: The Universal Appeal of Pie and the Gluten Challenge
- Why Gluten Free Matters: Understanding the Gluten-Free Baking Landscape
- Gluten Free in The Essential Gluten-Free Pie Crust Formula: Ingredients and Their Roles
- The Flour Blend: The Foundation of Texture
- The Binder: Recreating Gluten’s Elasticity
- The Fat: For Flakiness and Tenderness
- The Liquid: Hydration is Key
- Other Essential Components
- The Proven Step-by-Step Guide to Perfect Gluten-Free Pie Crust
- Step 1: Prepare Your Dry Ingredients
- Step 2: Cut in the Cold Fat
- Step 3: Gradually Add Ice Water
- Step 4: Form and Chill the Dough
- Step 5: Rolling the Dough
- Step 6: Transferring to the Pie Plate
- Step 7: Blind Baking (If Necessary)
- Step 8: Filling and Final Baking
- Nutritional Information: A Closer Look
- Expert Tips for Elevating Your Gluten-Free Pie Crust
- Common Pitfalls and How to Avoid Them
- Conclusion: The Reward of Patience and Precision
- Frequently Asked Questions
In the context of Gluten Free, This often leads to disappointment, with many believing that a truly exceptional gluten-free pie crust is an elusive dream. However, the science behind gluten-free baking is rapidly evolving, and with the right understanding of ingredients and techniques, achieving a sublime gluten-free pie crust is not only possible but entirely within reach for any home cook.
Around Gluten Free, The quest for a truly satisfying gluten-free pie crust often feels like searching for a culinary unicorn. The key lies not in merely substituting flours, but in understanding the intricate dance of binders, fats, and hydration that mimics gluten’s magic.
Why Gluten Free Matters: Understanding the Gluten-Free Baking Landscape
Regarding Gluten Free, The world of gluten-free baking is a fascinating intersection of science and art. Unlike conventional baking, where gluten provides structure, elasticity, and a desirable chewy texture, gluten-free baking requires a thoughtful combination of alternative flours and starches, often augmented by hydrocolloids or gums, to replicate these essential properties. This is not simply a matter of swapping wheat flour for rice flour; the complexities are far greater. Different gluten-free flours possess unique characteristics: almond flour adds richness and moisture but can be dense; oat flour contributes a pleasant chewiness and nutty flavor but can absorb a lot of liquid; coconut flour is highly absorbent and can lead to dryness if not balanced.
When it comes to Gluten Free, Starches like tapioca, potato, and cornstarch are crucial for lightness and binding.
In the context of Gluten Free, The challenge in gluten-free pie crusts is particularly acute. Without gluten’s natural elasticity, the dough is prone to cracking and crumbling, making it difficult to roll and handle. The goal is to create a dough that is pliable enough to be shaped but firm enough to hold its form during baking, all while delivering that coveted flaky texture. Research in food science has highlighted the importance of the fat-to-flour ratio and the type of fat used in achieving optimal texture in gluten-free baked goods. For instance, studies indicate that incorporating a blend of fats, such as butter and vegetable shortening, can improve both tenderness and flakiness in gluten-free pastry.
Gluten Free in The Essential Gluten-Free Pie Crust Formula: Ingredients and Their Roles
Around Gluten Free, Crafting a reliable gluten-free pie crust hinges on a carefully selected ensemble of ingredients, each playing a pivotal role in achieving the desired outcome. This is where the true expertise of gluten-free baking shines through, moving beyond simple substitutions to a more nuanced understanding of ingredient synergy.
The Flour Blend: The Foundation of Texture
Regarding Gluten Free, The heart of any pie crust lies in its flour blend. For gluten-free success, a single flour is rarely sufficient. A well-balanced blend is crucial for mimicking the properties of wheat flour.
- Brown Rice Flour: Provides a foundational structure and a slightly nutty flavor. It’s a good all-purpose gluten-free flour.
- White Rice Flour: Offers a lighter texture and a more neutral flavor, helping to prevent the crust from becoming too heavy.
- Tapioca Starch (or Flour): Essential for binding and creating a tender, slightly chewy texture. It also contributes to crispness.
- Potato Starch (or Flour): Adds lightness and helps to create a tender crumb. Ensure you are using potato starch, not potato flour, for a lighter result.
- Sorghum Flour (Optional but Recommended): Contributes a pleasant, slightly sweet flavor and a softer texture, improving the overall mouthfeel.
When it comes to Gluten Free, The precise ratio of these flours and starches is critical. A common and effective blend might look something like this: 1 cup brown rice flour, ½ cup white rice flour, ½ cup tapioca starch, ¼ cup potato starch. This combination offers a good balance of structure, tenderness, and binding.
The Binder: Recreating Gluten’s Elasticity
In the context of Gluten Free, Since gluten is absent, a binder is indispensable for holding the dough together and providing the necessary pliability.
- Xanthan Gum: This is the workhorse of gluten-free baking. A small amount of xanthan gum mimics gluten’s binding and elastic properties, preventing the crust from crumbling. Too much, however, can lead to a gummy texture. For a standard pie crust, ¼ to ½ teaspoon per cup of flour blend is usually sufficient.
- Psyllium Husk (Optional): Particularly effective in creating a more pliable dough that handles similarly to wheat-based dough. It absorbs water and creates a gel-like substance that enhances elasticity.
Around Gluten Free, [TIP]Expert Insight: When working with xanthan gum, it’s vital to ensure it’s evenly distributed throughout the dry ingredients before adding liquids. This prevents clumping and ensures consistent binding throughout the dough. A good whisking of the dry ingredients is paramount.
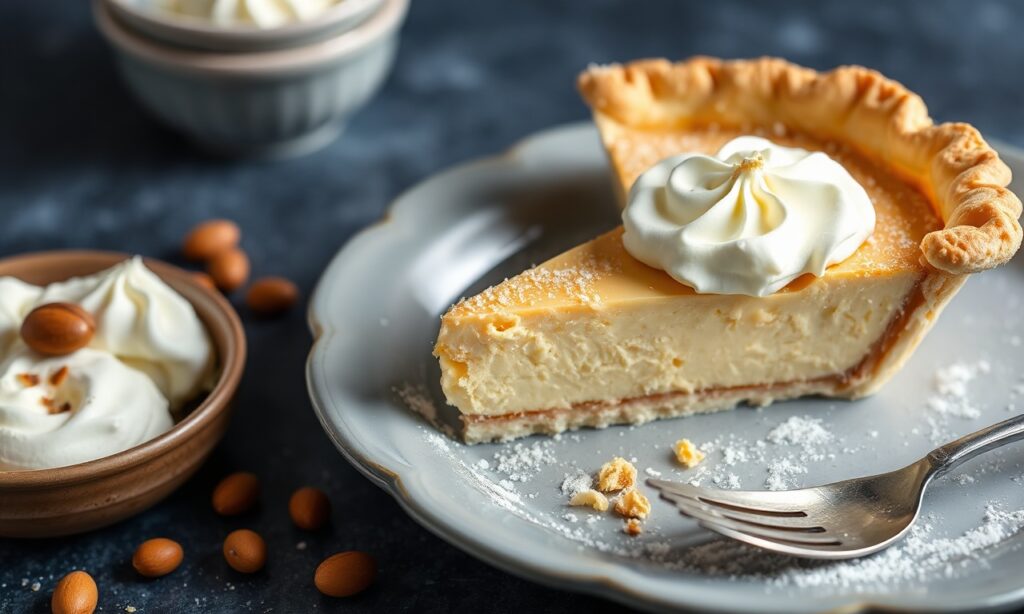
The Fat: For Flakiness and Tenderness
Regarding Gluten Free, Fat is crucial for creating flaky layers and ensuring a tender crust. The key is to keep the fat cold, as it will melt during baking, creating steam pockets that result in flakiness.
- Unsalted Butter: Provides superior flavor and contributes to a delicate crispness. It must be very cold, cut into small cubes.
- Vegetable Shortening (High-Quality): Adds incredible tenderness and helps create a more pliable dough that is easier to handle. Opt for trans-fat-free varieties.
- Coconut Oil (Refined, Solid): A dairy-free option that can also yield good results, provided it’s kept very cold and solid.
When it comes to Gluten Free, The ratio of butter to shortening can be adjusted to suit your preference for flavor versus ease of handling. A 50/50 blend is a popular choice.
The Liquid: Hydration is Key
In the context of Gluten Free, Liquid binds the ingredients together. The amount can vary depending on the flours used and the humidity.
- Ice Water: Absolutely essential for keeping the fat cold and preventing gluten development (even in gluten-free flours, overworking can lead to toughness). Start with a small amount and add more as needed.
Other Essential Components
- Salt: Enhances flavor and also helps to tenderize the crust.
- Sugar (Optional): A small amount of sugar can aid in browning and add a subtle sweetness, especially for dessert pies.
The Proven Step-by-Step Guide to Perfect Gluten-Free Pie Crust
Around Gluten Free, Mastering gluten-free pie crust is an achievable goal with this detailed, step-by-step approach. Each phase is designed to maximize texture and ease of handling, ensuring a successful outcome even for novice bakers.
Step 1: Prepare Your Dry Ingredients
Regarding Gluten Free, In a large mixing bowl, thoroughly whisk together your gluten-free flour blend, xanthan gum (if using), salt, and sugar (if using). Ensuring these components are uniformly distributed is critical. The xanthan gum, in particular, needs to be evenly dispersed to prevent pockets of gumminess or dryness in the final crust.
- Measure Flours Precisely: Use the spoon-and-level method for accuracy. Dip your measuring cup into the flour, then level off the excess with a straight edge. Avoid scooping directly from the bag, which can compact the flour.
- Whisk Vigorously: Spend at least 30 seconds whisking the dry ingredients together. This aeration also contributes to a lighter texture.
Step 2: Cut in the Cold Fat
When it comes to Gluten Free, Add your very cold, cubed butter and/or shortening to the bowl with the dry ingredients. Use a pastry blender, two forks, or your fingertips to cut the fat into the flour mixture. The goal is to achieve a coarse meal consistency, with some pieces of fat about the size of small peas and others the size of coarse sand. This is where the flakiness originates.
- Keep Everything Cold: If your hands get warm, rinse them under cold water and dry them thoroughly before continuing. Work quickly to prevent the fat from melting.
- Avoid Overworking: Overworking the fat into the flour will result in a tough crust. You want distinct pieces of fat remaining.
In the context of Gluten Free, [WARNING]Pro-Caution: If the fat is too warm, it will fully incorporate into the flour, leading to a dense and greasy crust rather than a flaky one. This is arguably the most crucial step for achieving the desired texture.
Step 3: Gradually Add Ice Water
Around Gluten Free, Begin adding the ice water, one tablespoon at a time, mixing gently with a fork or your hands after each addition. Continue adding water until the dough just begins to come together. You are looking for a dough that is cohesive but not sticky. It should hold together when squeezed but not feel wet or mushy.
- The “Clump” Test: Pinch a bit of dough between your fingers. If it holds together without crumbling apart, it’s likely hydrated enough.
- Hydration Varies: The exact amount of water needed can fluctuate based on the humidity and the specific blend of flours you’re using. It’s better to add too little and add more, than to add too much and make the dough sticky.
Step 4: Form and Chill the Dough
Regarding Gluten Free, Gently bring the dough together into a ball. Avoid kneading. Divide the dough in half if making a double-crust pie. Flatten each half into a disc, wrap tightly in plastic wrap, and refrigerate for at least 30 minutes, or preferably 1-2 hours. This chilling period is essential. It allows the flours to hydrate fully, the fat to re-solidify, and the dough to become firm and easier to handle.
- Why Chill? Chilling is non-negotiable for gluten-free pie crust. It prevents the dough from becoming overly sticky and prone to tearing when rolling, and it ensures the fat stays solid for maximum flakiness.
Step 5: Rolling the Dough
When it comes to Gluten Free, This is often the trickiest part of gluten-free pie crust. Working with gluten-free dough requires a different approach than traditional dough.
- Between Parchment Paper: The most effective method is to roll the dough between two sheets of parchment paper. This prevents sticking and makes it easy to transfer.
- Gentle and Even Pressure: Roll from the center outwards, rotating the parchment paper frequently to ensure an even thickness. If the dough cracks, simply press it back together with your fingers.
- Size Matters: Roll the dough to about ⅛-inch thickness, slightly larger than your pie plate.
Step 6: Transferring to the Pie Plate
In the context of Gluten Free, Once rolled, carefully peel off the top layer of parchment paper. You can then either:
- Invert and Peel: Place your pie plate upside down over the rolled dough. Carefully invert the entire stack, so the dough is now resting in the pie plate. Gently peel off the remaining parchment paper.
- Fold and Transfer: Carefully fold the dough in half or quarters (depending on its pliability) and transfer it to the pie plate. Unfold it gently and press it into place.
Around Gluten Free, Press the dough gently into the bottom and up the sides of the pie plate. Trim any excess dough, leaving about a ½-inch overhang. Fold this overhang under and crimp the edges decoratively.
Regarding Gluten Free, [TIP]Expert Insight: If your gluten-free dough becomes too soft to handle at any point during rolling, don’t hesitate to pop it back into the refrigerator for 10-15 minutes. This brief chill will firm it up considerably.
Step 7: Blind Baking (If Necessary)
When it comes to Gluten Free, For pies with wet fillings (like quiches or cream pies), blind baking the crust is essential to prevent a soggy bottom.
- Docking: Prick the bottom of the crust all over with a fork.
- Line with Parchment and Weights: Line the crust with parchment paper, ensuring it goes up the sides. Fill with pie weights, dried beans, or rice.
- Bake: Bake in a preheated oven at 375°F (190°C) for 15-20 minutes, or until the edges are lightly golden. Remove the parchment and weights, and bake for another 5-10 minutes until the bottom is dry and lightly golden. Let cool completely before filling.
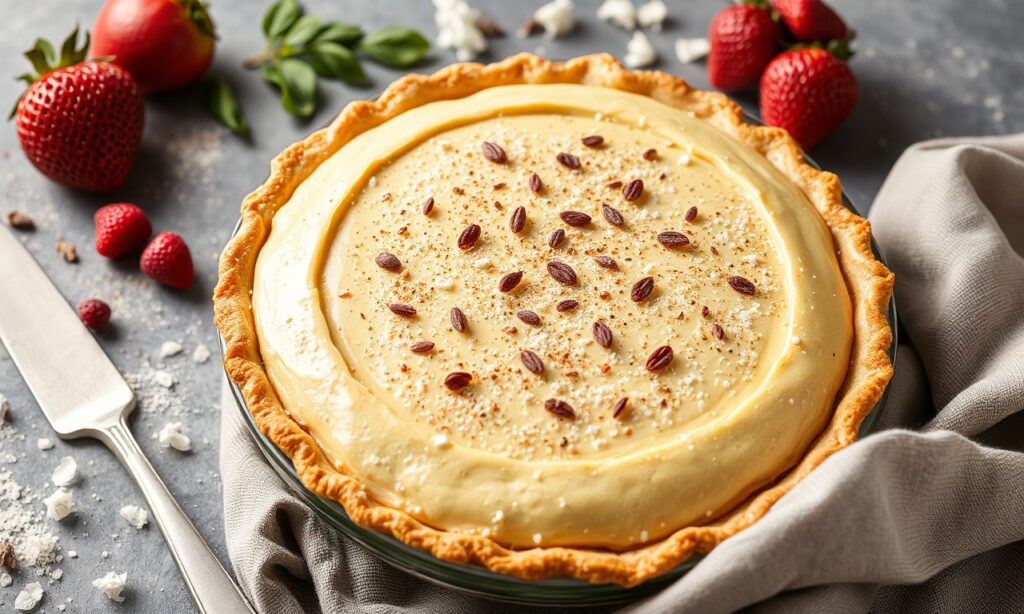
Step 8: Filling and Final Baking
In the context of Gluten Free, Once your crust is prepared, either blind-baked or ready for filling, proceed with your chosen pie recipe. Ensure your oven is preheated to the temperature specified in your recipe. For fruit pies, you may want to cover the edges of the crust with foil during the last 15-20 minutes of baking to prevent over-browning.
Nutritional Information: A Closer Look
Around Gluten Free, While specific nutritional values will vary significantly based on the exact flours, fats, and fillings used, a basic gluten-free pie crust made with the ingredients outlined above typically offers:
- Calories: Approximately 300-400 calories per serving (for a single crust, divided into 8 servings).
- Fat: Primarily from butter/shortening, contributing to richness and texture.
- Carbohydrates: Derived from rice flours and starches.
- Fiber: Moderate, depending on the proportion of brown rice flour or other whole-grain gluten-free flours.
- Protein: Relatively low compared to wheat-based crusts.
Regarding Gluten Free, Keep in mind that this is a general estimation. For precise nutritional data, it’s recommended to use a nutritional calculator with the specific ingredients and quantities you employ in your recipe.
Expert Tips for Elevating Your Gluten-Free Pie Crust
Beyond the basic steps, a few expert techniques can elevate your gluten-free pie crust from good to truly exceptional, rivaling its gluten-containing counterparts. These are the nuanced details that experienced bakers employ to achieve superior results.
- The Power of Chilled Fat Cubes: Ensure your butter and shortening are not just cold, but *frozen* for maximum effect. When these frozen cubes hit the hot oven, they create larger steam pockets, leading to superior flakiness.
- A Splash of Vinegar or Lemon Juice: Adding about ½ teaspoon of apple cider vinegar or lemon juice to the ice water can help tenderize the crust. The acid may weaken protein bonds that might form in gluten-free flours, even without gluten, resulting in a more tender texture.
- Don’t Fear Imperfection: Gluten-free dough can be more fragile. A few cracks are normal. Embrace them and gently press them back together. A rustic charm is often part of the appeal.
- Experiment with Flavor Infusions: For dessert pies, consider adding a pinch of cinnamon, nutmeg, or even finely grated citrus zest to the dry ingredients for an added layer of flavor.
- Resting is Crucial: While chilling is covered, consider an additional short rest after rolling if the dough feels overly sticky. A 10-minute pause in the fridge can make all the difference.
Common Pitfalls and How to Avoid Them
Even with the best intentions, gluten-free pie crusts can present unique challenges. Understanding these common pitfalls is key to consistent success.
- Crumbly Dough: This is often due to insufficient hydration or too much fat. Add water very gradually, and ensure you are mixing until the dough *just* comes together. If it’s too dry, it will crumble.
- Gummy Texture: This is usually a result of too much xanthan gum or overworking the dough. Stick to the recommended amount of xanthan gum and handle the dough as little as possible. Ensure the fat is properly cut in, not fully incorporated.
- Tough Crust: Overworking the dough, especially when it’s warm, can lead to toughness. Always work with cold ingredients and handle the dough minimally.
- Soggy Bottom: This is the bane of many pie bakers. Blind baking is the most effective solution. Ensure the crust is thoroughly baked before adding a wet filling. Also, consider adding a thin layer of melted chocolate or a sprinkle of finely ground nuts at the bottom of the crust before filling; they create a barrier that absorbs moisture.
Conclusion: The Reward of Patience and Precision
The journey to a perfect gluten-free pie crust is one that rewards patience and precision. By understanding the role of each ingredient, mastering the techniques of fat incorporation and hydration, and embracing the unique characteristics of gluten-free flours, you can consistently produce beautiful, flaky, and delicious pie crusts. The satisfaction of enjoying a homemade pie, free from gluten, is immense, and with this guide, that joy is now more accessible than ever. The science behind gluten-free baking has advanced significantly, making it possible to achieve textures and flavors that were once thought to be unattainable without gluten.
Frequently Asked Questions
What is the best gluten-free flour blend for pie crust?
The best blends typically combine a structural flour like brown rice flour with lighter flours and starches such as white rice flour, tapioca starch, and potato starch. A ratio that balances these elements will yield a superior texture. For instance, a blend of 1 cup brown rice flour, ½ cup white rice flour, ½ cup tapioca starch, and ¼ cup potato starch is a reliable starting point.
How do I prevent my gluten-free pie crust from cracking?
Cracking is often due to insufficient hydration or the dough being too cold and brittle. Ensure you add enough ice water for the dough to just come together. If the dough is too stiff or has been refrigerated for too long, let it sit at room temperature for a few minutes before rolling. Rolling between parchment paper also helps to manage cracking and makes handling easier. Gently pressing any cracks back together with your fingers is usually sufficient.
Can I make gluten-free pie crust ahead of time?
Yes, gluten-free pie crust dough can be made ahead and refrigerated for up to 2 days. Wrap the disc tightly in plastic wrap and store it in the refrigerator. For longer storage, you can freeze the dough for up to 3 months. Thaw it in the refrigerator overnight before using. Ensure it is well-wrapped to prevent freezer burn.
What is the role of xanthan gum in gluten-free pie crust?
Xanthan gum acts as a binder, mimicking the elasticity and structure that gluten provides in traditional pie crusts. It helps to hold the dough together, prevent it from crumbling, and improve its pliability for rolling and shaping. However, it’s crucial to use it in moderation, as too much can result in a gummy texture.
How do I achieve a flaky gluten-free pie crust?
Flakiness comes from keeping the fat (butter and/or shortening) very cold and in small pieces throughout the dough. When the crust bakes, the water in the fat turns to steam, creating pockets that push apart the layers of dough. Properly cutting in cold fat and avoiding overworking the dough are key. Chilling the dough thoroughly before rolling also plays a significant role.
See also: Gluten Free


