When it comes to Vanilla Granola, “The most important thing in cooking is to be brave. Try new things, taste everything, and never be afraid to make a mistake.” – Julia Child
- The Allure of Vanilla Granola: More Than Just Breakfast
- Understanding the Foundation: Key Ingredients for Allergy-Friendly Vanilla Granola
- The Art of Crafting Perfect Vanilla Granola: A Step-by-Step Recipe
- Ingredients
- Preparation Method
- Nutritional Information (Approximate per ½ Cup Serving)
- Elevating Your Vanilla Granola: Expert Tips for Culinary Excellence
- The Allergy-Friendly Promise: Ensuring Safety and Trust
- Beyond Breakfast: Creative Uses for Your Vanilla Granola
- Frequently Asked Questions
Vanilla granola has transcended its humble origins to become a staple for health-conscious individuals and families seeking a delicious, customizable, and often allergy-friendly breakfast or snack. Its versatility, coupled with the comforting aroma of vanilla, makes it an enduring favorite. Achieving that perfect balance of crunch, chew, and flavor, while meticulously avoiding common allergens, requires a nuanced understanding of ingredients and techniques. This guide equips you with the expertise to craft exceptional vanilla granola that caters to even the most sensitive dietary needs, ensuring every bite is proof of thoughtful preparation and pure indulgence.
The true magic of vanilla granola lies not just in its taste, but in its adaptability, offering a canvas for personalized nutrition and flavor profiles that can be tailored to virtually any dietary requirement.
The Allure of Vanilla Granola: More Than Just Breakfast
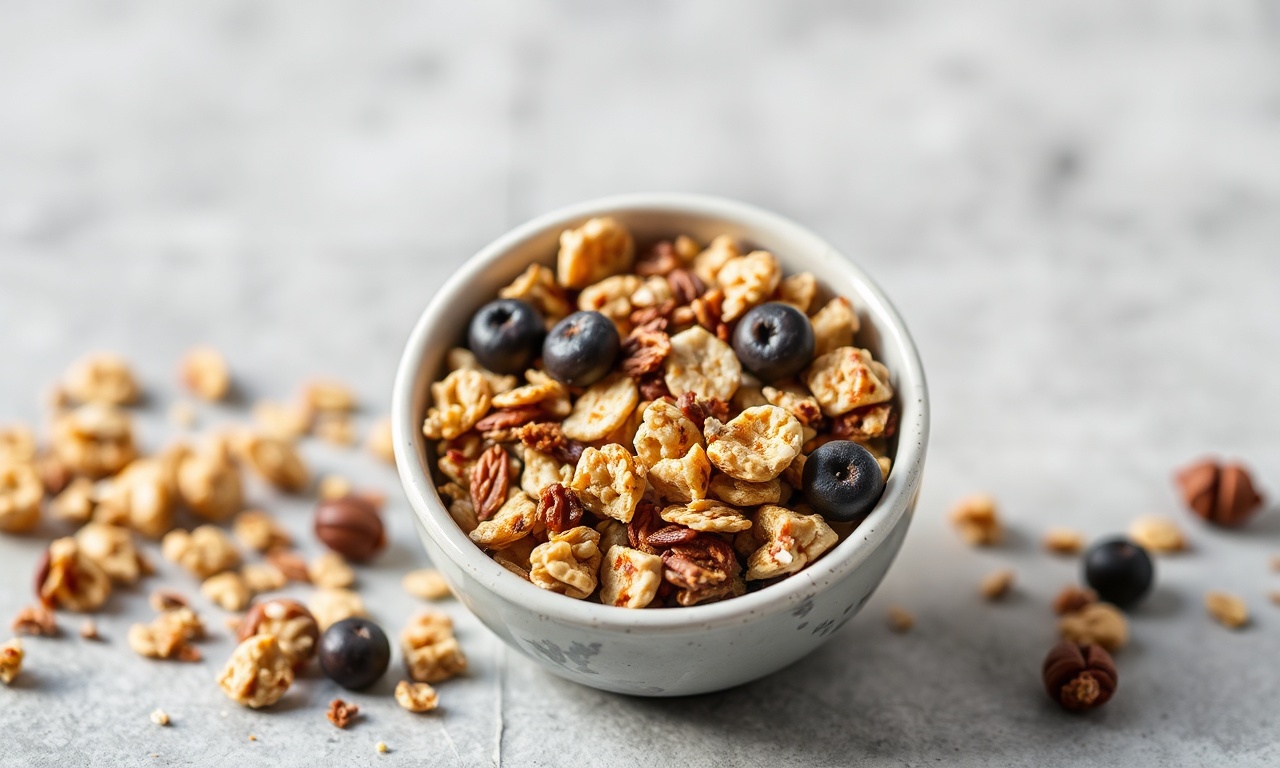
Vanilla granola’s appeal is multifaceted. It’s a convenient grab-and-go option, a delightful topping for yogurt parfaits and smoothie bowls, and a satisfying snack on its own. The warm, inviting notes of vanilla provide a comforting base that pairs beautifully with a wide array of fruits, nuts, and seeds. Beyond its sensory pleasure, granola represents a conscious choice for many to move away from highly processed cereals, opting instead for whole ingredients that offer sustained energy and essential nutrients. The “allergy-friendly” aspect is particularly crucial in today’s culinary landscape, where sensitivities to gluten, dairy, nuts, and soy are increasingly common.
Crafting a vanilla granola that is free from these triggers without sacrificing taste or texture is a challenge many home cooks and bakers embrace, turning a simple recipe into a culinary triumph that can be shared safely with loved ones.
Understanding the Foundation: Key Ingredients for Allergy-Friendly Vanilla Granola
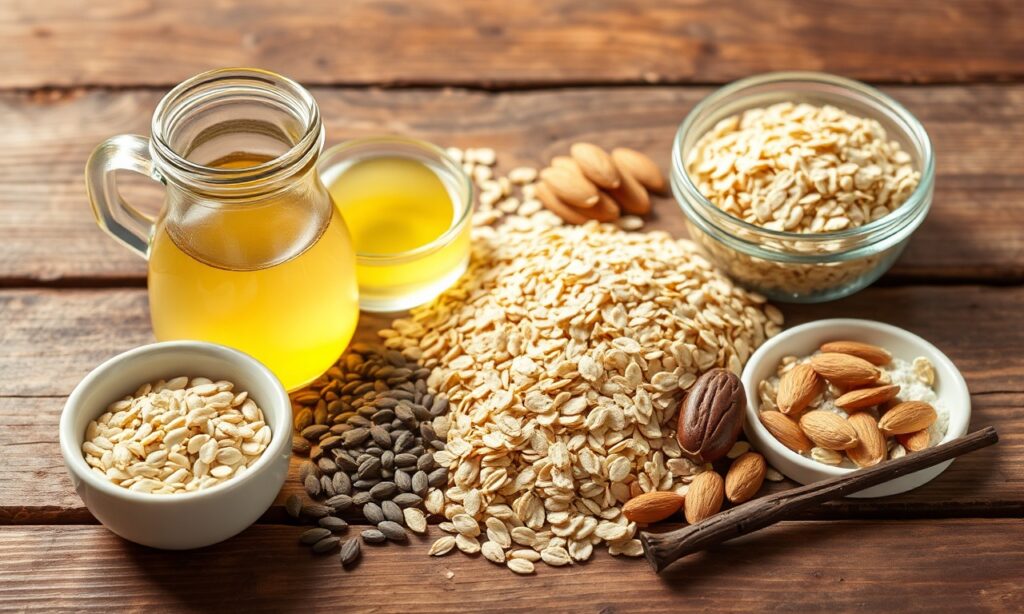
The cornerstone of any successful vanilla granola recipe, especially one designed for allergy sufferers, lies in a judicious selection of core ingredients. Each component matter significantly in texture, flavor, and nutritional profile.
The Grain Base: Beyond Wheat and Oats
In the context of Vanilla Granola, For those avoiding gluten, the traditional oat base requires careful consideration. Certified gluten-free oats are an option for many, but individuals with severe celiac disease or a sensitivity to avenin (a protein found in oats) may need to explore alternatives.
- Certified Gluten-Free Rolled Oats: Ensure they are certified to prevent cross-contamination. These provide a classic chewy texture and a good source of fiber.
- Quinoa Flakes: A fantastic gluten-free alternative, quinoa flakes offer a slightly nutty flavor and a good protein boost. They cook down to a pleasing chewiness.
- Buckwheat Groats (Toasted): These are not related to wheat. Toasted buckwheat groats offer a delightful crunch and a distinct, earthy flavor that complements vanilla.
- Amaranth Puffs: Light and airy, amaranth puffs add a delicate crispness. They are a good source of calcium and iron.
- Millet Flakes: Similar to oat flakes, millet flakes provide a mild flavor and a tender texture.
The Sweeteners: Natural and Allergen-Conscious Options
Around Vanilla Granola, Achieving the right level of sweetness is paramount, and for allergy-friendly granola, this means avoiding common culprits like refined sugars and corn syrup.
- Maple Syrup: A classic choice, pure maple syrup offers a complex flavor and a liquid binder. Its natural sweetness is well-balanced.
- Agave Nectar: A vegan sweetener with a neutral flavor profile, agave nectar is a good binder. Use it judiciously, as it is quite sweet.
- Coconut Nectar: Derived from coconut blossoms, this sweetener provides a subtle caramel note and is a good source of minerals.
- Date Paste: Made from blended dates, date paste offers natural sweetness and fiber. It can contribute a slightly darker hue and a chewier texture.
- Mashed Banana: A ripe mashed banana can add sweetness and moisture, along with potassium. It’s best used in recipes where its flavor is desired.
The Binding Agent: Healthy Fats and Emulsifiers
Regarding Vanilla Granola, Fats are crucial for binding the ingredients, achieving that desirable crispness, and enhancing flavor.
- Coconut Oil: A popular choice for its healthy medium-chain triglycerides (MCTs) and its ability to solidify when cooled, contributing to crunch. Unrefined coconut oil imparts a subtle coconut flavor.
- Avocado Oil: With a high smoke point and a neutral flavor, avocado oil is excellent for baking and roasting granola.
- Melted Ghee: For those who tolerate dairy derivatives but avoid milk solids, ghee can be a rich, buttery option. Ensure it’s pure ghee.
- Nut Butters (if tolerated): Almond, cashew, or sunflower seed butters can add richness and act as a binder. *Note: For nut-free recipes, sunflower seed butter is an excellent alternative.*
- Seed Butters: Tahini (sesame seed paste) or sunflower seed butter are excellent nut-free binders, offering unique flavor profiles.
The Flavor Enhancers: Vanilla and Beyond
The star of the show, vanilla, needs to be potent and pure.
- Pure Vanilla Extract: The most accessible and common form. Opt for pure extract, not imitation.
- Vanilla Bean Paste: Contains flecks of vanilla bean, offering intense flavor and visual appeal.
- Vanilla Bean Seeds: Scraped directly from a vanilla bean pod, this provides the most concentrated and authentic vanilla flavor.
When it comes to Vanilla Granola, Beyond vanilla, consider other spices and additions that are generally allergy-friendly:
- Cinnamon: A warming spice that pairs perfectly with vanilla.
- Nutmeg: Adds a hint of warmth and complexity.
- Cardamom: Offers a fragrant, slightly citrusy note.
- Sea Salt: A pinch of salt balances sweetness and enhances other flavors.
The Art of Crafting Perfect Vanilla Granola: A Step-by-Step Recipe
In the context of Vanilla Granola, This recipe is designed to be a template, easily adaptable to various dietary needs by swapping out specific ingredients as outlined above. This version focuses on a classic, gluten-free, and dairy-free base.
Yields: Approximately 6 cups
Prep time: 15 minutes
Bake time: 25-35 minutes
Prep time: 15 minutes
Bake time: 25-35 minutes
Ingredients
For the ultimate allergy-friendly vanilla granola experience, precise measurements are key. This formulation balances crunch, chewiness, and delightful vanilla notes.
- Dry Ingredients:
- 3 cups Certified Gluten-Free Rolled Oats (or a blend of quinoa flakes, millet flakes, and buckwheat groats)
- 1 cup Raw Pumpkin Seeds (Pepitas)
- 1 cup Raw Sunflower Seeds
- ½ cup Unsweetened Shredded Coconut (optional, omit for coconut-free)
- ½ teaspoon Ground Cinnamon
- ¼ teaspoon Ground Nutmeg (optional)
- ½ teaspoon Fine Sea Salt
- Wet Ingredients:
- ⅔ cup Pure Maple Syrup (or agave nectar, coconut nectar)
- ½ cup Melted Coconut Oil (or avocado oil)
- 2 teaspoons Pure Vanilla Extract (or 1 teaspoon vanilla bean paste)
Preparation Method
Around Vanilla Granola, The process is straightforward, focusing on even coating and controlled baking to achieve optimal texture.
- Preheat Oven and Prepare Baking Sheet: Preheat your oven to 300°F (150°C). Line a large rimmed baking sheet with parchment paper for easy cleanup and to prevent sticking.
- Combine Dry Ingredients: In a large mixing bowl, combine the certified gluten-free rolled oats (or your chosen grain blend), pumpkin seeds, sunflower seeds, unsweetened shredded coconut (if using), ground cinnamon, ground nutmeg (if using), and fine sea salt. Whisk gently to ensure all dry ingredients are evenly distributed.
- Whisk Wet Ingredients: In a separate, smaller bowl, whisk together the pure maple syrup (or your chosen liquid sweetener), melted coconut oil (or other oil), and pure vanilla extract (or vanilla bean paste) until well combined and emulsified.
- Combine Wet and Dry: Pour the wet ingredients over the dry ingredients in the large bowl. Using a sturdy spatula or your hands (lightly oiled, if preferred), thoroughly mix everything together. Ensure that every single oat and seed is coated with the liquid mixture. This step is crucial for even toasting and binding.
- Spread onto Baking Sheet: Evenly spread the granola mixture in a single layer onto the prepared baking sheet. Do not overcrowch the pan; use two pans if necessary to ensure even baking and crisping. For larger clusters, gently press down the mixture.
- Bake and Stir: Bake for 15 minutes. Remove the baking sheet from the oven and gently stir the granola with your spatula. This ensures even browning and prevents the edges from burning.
- Continue Baking: Return the baking sheet to the oven and continue to bake for another 10-20 minutes, stirring every 5-7 minutes, until the granola is golden brown and fragrant. The exact baking time will vary depending on your oven and the ingredients used. Watch carefully to prevent burning.
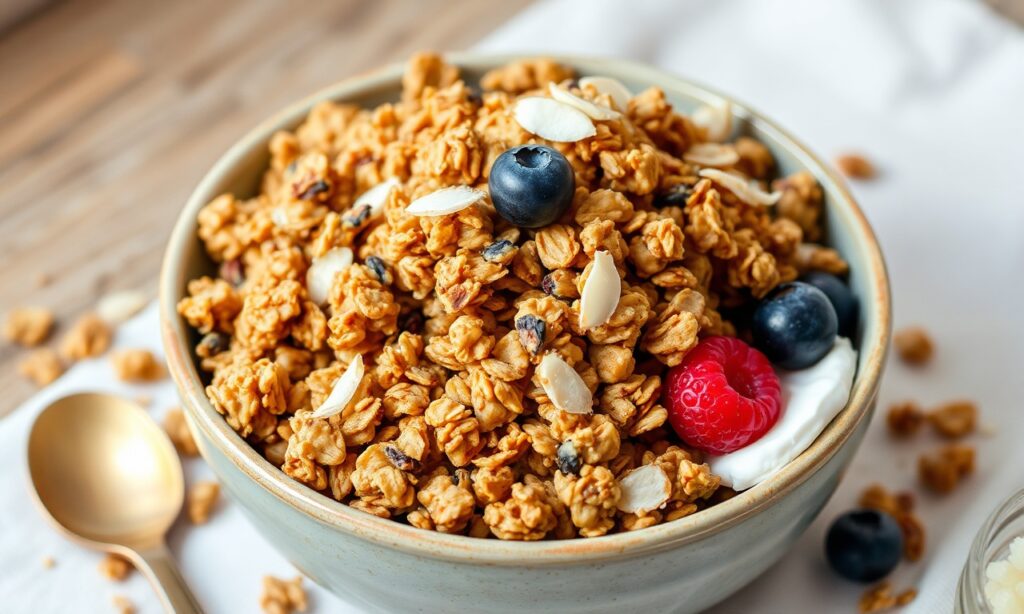
- Cool Completely: Once baked, remove the granola from the oven and let it cool completely on the baking sheet without stirring. As it cools, it will crisp up significantly. Resist the urge to break it apart too soon; larger clusters will form naturally as it cools.
- Store Properly: Once completely cool, break apart the granola into desired cluster sizes. Store in an airtight container at room temperature for up to two weeks. For longer storage, it can be frozen.
Nutritional Information (Approximate per ½ Cup Serving)
The nutritional profile of your vanilla granola will vary based on the specific ingredients and quantities used. This estimate is based on the recipe above, omitting the optional coconut.
- Calories: 250-300
- Total Fat: 15-20g (primarily from healthy fats in seeds and oil)
- Saturated Fat: 5-8g (if using coconut oil)
- Cholesterol: 0mg
- Sodium: 100-150mg
- Total Carbohydrates: 25-30g
- Dietary Fiber: 5-7g
- Total Sugars: 10-15g (primarily from natural sweeteners)
- Protein: 8-10g
Regarding Vanilla Granola, It’s essential to note that consuming granola as part of a balanced meal, such as with yogurt or fruit, can further enhance its nutritional value, providing additional vitamins, minerals, and protein.
Elevating Your Vanilla Granola: Expert Tips for Culinary Excellence
When it comes to Vanilla Granola, Achieving granola that is consistently delicious and perfectly textured involves more than just following a recipe. Drawing from extensive experience in recipe development and allergen-conscious baking, these insights can transform your homemade granola from good to extraordinary.
Mastering Texture: The Key to Irresistible Granola
In the context of Vanilla Granola, The holy grail of granola making is achieving that perfect crunch without it being overly dry or rock-hard, and avoiding an overly chewy, underbaked texture.
- The Right Oven Temperature is Paramount: A moderate oven temperature, such as 300°F (150°C), is crucial. High heat can burn the sweeteners and nuts/seeds before the oats are properly toasted, leading to a bitter taste and uneven texture. Low and slow is the mantra here.
- Even Spreading is Non-Negotiable: Ensure the granola is spread in a single, even layer on the baking sheet. Thick patches will steam rather than toast, resulting in a chewy, unappealing texture. If your baking sheet is too small, use two.
- Strategic Stirring: Stirring your granola halfway through the baking process is vital. This allows for even browning and prevents the edges from becoming too dark while the center remains pale. However, avoid over-stirring, which can break up desirable clusters.
- The Power of Complete Cooling: This is perhaps the most overlooked step. Granola continues to crisp up as it cools. Breaking it apart while it’s still warm will result in a softer, chewier texture. Allow it to cool completely on the baking sheet undisturbed for optimal crispness and cluster formation.
Flavor Innovations and Allergen Adaptations
Once you’ve mastered the basic vanilla recipe, the possibilities for flavor customization are nearly endless, especially when accommodating dietary restrictions.
- Seed Powerhouse: For nut-free versions, sunflower seeds, pumpkin seeds, hemp seeds, and chia seeds are excellent choices. Tahini (sesame paste) can also act as a binder and add a rich, savory note.
- Fruit Integration: Dried fruits like cranberries, raisins, chopped apricots, or dates can be added *after* the granola has cooled. Adding them during baking can cause them to burn or become overly tough. For a softer texture, reconstitute dried fruit by soaking it in warm water for a few minutes before adding it to the cooled granola.
- Spice Combinations: Experiment with other warm spices like ginger, allspice, or even a touch of black pepper for a surprising twist. A pinch of cardamom can add an exotic, fragrant aroma.
- Chocolate Indulgence: Dairy-free chocolate chips can be stirred in once the granola is completely cool to prevent melting. Ensure they are made with cocoa butter and are free from milk derivatives.
- Citrus Zest: A tablespoon or two of finely grated lemon or orange zest added to the wet ingredients can provide a bright, refreshing counterpoint to the vanilla and sweetness.
Studies show that different baking temperatures and stirring frequencies significantly impact the textural properties and overall desirability of granola, reinforcing the importance of precise technique. Research has explored various grain combinations for breakfast cereals, indicating the potential for diverse, nutrient-dense bases beyond traditional oats.
The Allergy-Friendly Promise: Ensuring Safety and Trust
When crafting granola for individuals with allergies, diligence in ingredient sourcing and preparation is paramount. Cross-contamination is a serious concern, and clear communication about ingredients is vital.
Navigating Allergen Labels
Always scrutinize ingredient labels for hidden allergens. Manufacturers may use different processing facilities, leading to potential cross-contamination.
- Certified Options: Look for products explicitly labeled “Certified Gluten-Free,” “Nut-Free Facility,” “Dairy-Free,” etc. This provides an extra layer of assurance.
- Ingredient Transparency: If you are making granola for others, clearly list all ingredients used. This empowers individuals with allergies to make informed decisions about consumption.
- Dedicated Utensils and Surfaces: If you are baking for someone with severe allergies, use clean, dedicated utensils, bowls, and baking sheets that have not come into contact with their allergens. Thoroughly wash all equipment before use.
Organizations dedicated to food allergy research consistently emphasize the importance of reading labels and understanding the potential for cross-contact, especially for severe allergies. Their resources are invaluable for anyone preparing food for those with dietary restrictions.
Beyond Breakfast: Creative Uses for Your Vanilla Granola
While traditionally a breakfast item, your expertly crafted vanilla granola can be integrated into a myriad of culinary creations, adding texture and flavor.
- Yogurt and Smoothie Bowl Topping: The classic use, providing a delightful crunch and sweetness.
- Ice Cream and Frozen Yogurt Companion: A healthier alternative to processed toppings.
- Salad Enhancer: A sprinkle of granola can add a surprising sweet and savory crunch to green salads, especially those with fruits or cheese (if tolerated).
- Baked Goods Inclusion: Fold into muffin batter, cookie dough, or use as a crust for cheesecakes or fruit tarts (ensure all components are allergen-free).
- Energy Bites: Combine granola with nut/seed butter, a binder like dates or honey, and roll into bite-sized energy balls.
Frequently Asked Questions
Q1: How can I make my vanilla granola extra crunchy?
To achieve maximum crunch, ensure you are using a sufficient amount of healthy fats (like coconut oil or avocado oil) to coat the ingredients. Spread the granola in a very thin, even layer on the baking sheet. Bake at a moderate temperature (around 300°F/150°C) and stir only once or twice during baking. Crucially, allow the granola to cool completely on the baking sheet without disturbing it. It will continue to crisp up as it cools.
Q2: My granola is too hard. What did I do wrong?
Over-baking is the most common culprit for excessively hard granola. It can also occur if too little sweetener or fat was used, as these components help maintain a slight chewiness. If your granola is too hard, try adding a tablespoon or two of a liquid sweetener (like maple syrup) to a portion of it, briefly re-baking, and then cooling. Alternatively, you can rehydrate it by adding it to moist ingredients like yogurt or smoothies.
Q3: Can I make vanilla granola without any sweetener?
While it’s challenging to achieve a traditional granola texture and flavor without any sweetener, you can significantly reduce the amount. For a less sweet version, use a combination of unsweetened applesauce or mashed banana for moisture and a very small amount of liquid sweetener. The lack of sweetener will impact its binding and crisping capabilities, so expect a less clumpy and potentially softer texture. You can also rely on the natural sweetness of added ingredients like dried fruits (added after baking).
Q4: How long does homemade vanilla granola typically last?
When stored in an airtight container at room temperature, homemade vanilla granola will typically stay fresh and retain its crispness for about two weeks. Factors like humidity and the type of fats used can influence its shelf life. For longer storage, you can freeze granola in a freezer-safe bag or container for up to two to three months.
Q5: What are good nut-free alternatives for granola?
Excellent nut-free alternatives include a variety of seeds such as pumpkin seeds (pepitas), sunflower seeds, hemp seeds, chia seeds, and flax seeds. For binding and flavor, tahini (sesame seed paste) or sunflower seed butter are fantastic options. You can also incorporate toasted gluten-free grains like quinoa flakes or millet flakes for added texture and substance.
See also: Vanilla Granola

