There’s nothing quite as satisfying as opening your fridge to a row of perfectly packed meal prep containers–each one a promise of nutritious, stress-free meals ahead. But before you dive into your next culinary masterpiece, there’s one crucial step that often gets overlooked: washing those containers the right way. Sparkling clean containers aren’t just about aesthetics; they’re key to keeping your food fresh, your fridge odor-free, and your kitchen hygienic. In this article, we’ll unveil top tips to wash meal prep containers right-because a little extra care today means fresher meals and happier taste buds tomorrow. Get ready to transform your cleanup routine from chore to charm!
Harnessing the Power of Natural Cleaning Agents for Sparkling Fresh Meal Prep Containers
Sparkling Fresh meal prep containers are a kitchen staple, but maintaining their crisp clarity and odor-free state can be challenging. Fortunately, nature offers some of the most effective and eco-friendly solutions for tackling stubborn stains and lingering smells. Harnessing ingredients like baking soda, white vinegar, and lemon not only cleans deeply but also refreshes your containers without harsh chemicals.
Prep and Cook Time
- Preparation: 5 minutes
- Soaking time: 30 minutes
- Cleaning & Drying: 15 minutes
Yield
- Serves: Cleans 4-6 standard meal prep containers
Difficulty Level
- Easy
Ingredients
- 1 cup warm water
- 2 tablespoons baking soda (a natural stain fighter)
- 1 cup white vinegar (excellent for deodorizing and disinfecting)
- Juice of 1 lemon (for a fresh citrus scent and cutting grease)
- 1 teaspoon liquid castile soap (optional, for gentle grease removal)
- Clean microfiber cloth or non-abrasive sponge
- Drying rack or clean kitchen towel
Instructions
- Prepare your natural cleaning solution. In a large bowl or sink basin, combine warm water, baking soda, and white vinegar. A slight fizzing will signal their stain-fighting magic beginning.
- Submerge your containers. Place stained or odor-prone meal prep containers into the solution. Add lemon juice to help dissolve residual grease and infuse a fresh aroma.
- Let soak. Allow the containers to sit for 30 minutes, giving the natural agents time to break down tough stains and neutralize odors.
- Gently scrub and rinse. Remove containers one by one and use a microfiber cloth or sponge to lightly scrub away any loosened residue. Rinse thoroughly under warm running water.
- Optional grease-fighting step. For stubborn oily residue, apply a drop of liquid castile soap to your sponge when scrubbing to lift the grease naturally without harsh chemicals.
- Dry properly. To avoid water spots and mold, place containers upside down on a drying rack or pat dry with a clean towel. Leave lids off or ajar to prevent trapped moisture.
Tips for Success
- For deeply stained lids, repeat the soaking process or create a paste of baking soda and lemon juice to scrub buildup more effectively.
- Never stack containers while damp; this can create unwanted bacteria and odors.
- Consider placing a small piece of baking soda inside container storage areas to absorb any future odors naturally.
- To maintain sparkling clarity, occasionally wash containers in cycles with a few drops of eco-friendly dishwasher detergent.
- For plastic containers that retain odors, freezing them uncovered overnight can neutralize smells effectively.
Serving Suggestions
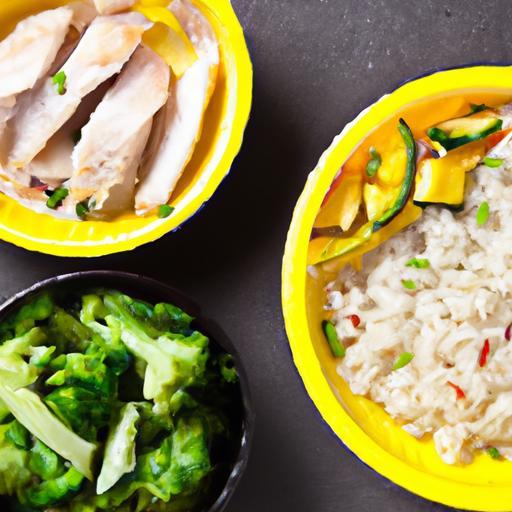
Once thoroughly cleaned, your meal prep containers look as inviting as the meals inside. Present your healthy lunches or snacks in sparkling fresh containers to inspire mindful eating throughout the week. Garnish your stored meals with vibrant herbs or edible flowers sealed separately to preserve freshness and visual appeal.
| Ingredient | Purpose | Eco Benefit |
|---|---|---|
| Baking Soda | Stain remover, deodorizer | Non-toxic, biodegradable |
| White Vinegar | Sanitizes, removes odors | Natural disinfectant, safe for environment |
| Lemon Juice | Freshens scent, cuts grease | 100% natural, sustainable |
| Castile Soap | Grease cleaner | Plant-based, biodegradable |

For those seeking more detailed care routines, check out our comprehensive guide on sustainable kitchen cleaning techniques to elevate your eco-conscious culinary lifestyle.
Q&A
Q&A: Sparkling Fresh – Top Tips to Wash Meal Prep Containers Right
Q1: Why is it important to properly wash meal prep containers?
A: Properly washing meal prep containers is essential to prevent lingering odors, avoid staining, and eliminate harmful bacteria. Clean containers keep your meals fresh, safe, and appetizing, turning your food prep routine into a hygienic and enjoyable experience.
Q2: What’s the first step to achieving a sparkling fresh meal prep container?
A: Start by rinsing immediately after use! This stops food residue from drying and sticking, making the cleaning process much easier. A quick rinse with warm water prevents stubborn stains and lingering smells from setting in.
Q3: Can I put all meal prep containers in the dishwasher?
A: Not necessarily. Check the manufacturer’s guidelines first. While many plastic and glass containers are dishwasher safe, repeated high-heat cycles can sometimes warp plastics or dull finishes. For delicate or stained containers, hand washing often yields better results.
Q4: What’s the best method to remove stubborn stains and odors?
A: A natural powerhouse: baking soda! Sprinkle baking soda inside the container, add a little water to form a paste, then scrub gently. For odors, letting a mixture of baking soda and lemon juice sit overnight can work wonders. Alternatively, a soak in diluted vinegar helps break down tough residues.
Q5: Should I pay attention to the lids differently than the containers?
A: Absolutely! Lids, especially those with silicone seals or multiple parts, tend to trap food and moisture more easily. Remove any seals, if possible, and clean them separately. Use a small brush to get into grooves and ensure every nook is gleaming.
Q6: How can I speed up the drying process?
A: Air drying is best to avoid moisture buildup, but speeding it up can be as simple as placing containers upside down on a drying rack. For lids and seals, towel drying first helps prevent mold and preserves their flexibility. Sunlight also acts as a natural sanitizer while drying your containers.
Q7: Any tips to maintain my containers looking new longer?
A: Avoid harsh abrasives and use gentle sponges to prevent scratches. Store containers with lids off to allow airflow and prevent trapped moisture. Rotating containers to reduce exposure to staining foods (like tomato sauces) and promptly cleaning after use will keep them pristine for months or even years.
Q8: What if I’m in a rush and can’t wash immediately?
A: If you can’t clean right away, at least soak your containers in warm water. This prevents food from baking on and reduces the effort needed later. Even a quick rinse helps-anything that stops residue from hardening is a win!
With these sparkling tips, your meal prep containers will stay fresh, flawless, and ready to fuel your week ahead-one delicious bite at a time!
Key Takeaways
In the busy world of meal prepping, keeping your containers sparkling fresh isn’t just a chore-it’s a game changer for your kitchen routine. Armed with these top tips, you can say goodbye to stubborn stains and lingering odors, and hello to containers that look and smell just like new. Remember, a little extra care goes a long way in preserving the freshness of your meals and the longevity of your containers. So next time you’re done with your delicious creations, wash smart, rinse right, and store with confidence. Your future self-and your taste buds-will thank you!


