In the world of culinary creativity, infused oils and vinegars are more than just ingredients-they are the vibrant soul of a dish, capturing the essence of herbs, spices, and fruits in every drop. But as you embark on the delightful journey of crafting these aromatic elixirs, one crucial step often goes overlooked: labeling. Mastering the art of labeling your infused oils and vinegars not only brings order to your kitchen but also transforms these homemade treasures into personalized masterpieces. From preserving the story behind each infusion to ensuring safety and enhancing presentation, a well-crafted label is the silent ambassador of your craft. Join us as we explore how thoughtful labeling can elevate your infusion artistry from simple storage to an inspired expression of flavor and finesse.
Choosing the Perfect Labels for Your Infused Creations
Mastering the Art: Labeling Your Infused Oils & Vinegars begins with selecting labels that both enhance and protect your flavorful masterpieces. When you create these aromatic infusions, your labels should communicate their essence clearly and beautifully, inviting curiosity and delight even before the first taste.
Prep and Cook Time
- Design Preparation: 30 minutes
- Printing and Application: 15 minutes per batch
Yield
- Enough labels for 12 standard 250ml bottles
Difficulty Level
- Easy to Medium – depending on design software skills
Ingredients
- High-quality printable sticker paper (waterproof preferred)
- Inkjet or laser printer
- Design software or online label maker (e.g., Canva, Adobe Illustrator)
- Clear laminate sheets (optional, for extra durability)
- Scissors or craft knife for precise cutting
- Rubbing alcohol or cleaning wipes for bottle prep
Instructions
- Start Strong: Open your preferred design tool and create a canvas sized to your bottle’s label area, usually around 3×4 inches. Incorporate elegant fonts and color schemes that complement your infused oil or vinegar hues.
- Essential Elements: Clearly display the infusion’s name, date created, and key ingredients using legible and inviting typography. Remember to include allergy info if necessary.
- Make it Visual: Add small botanical illustrations or minimalist imagery to evoke the essence inside the bottle. A sprig of rosemary or a garlic clove icon can enhance appeal without cluttering.
- Proofread and Test Print: Review spelling, measurements, and layout. Print a test label on standard paper, then affix it to a bottle to verify size and readability.
- Print and Cut: Print your designs on waterproof or oil-resistant sticker paper. Use scissors or a craft knife to cut out the labels precisely, following your design edges.
- Prep Your Bottles: Before application, clean bottles with rubbing alcohol to remove dust and oils, ensuring the label adheres smoothly and lasts.
- Apply Labels: Peel and stick the label carefully, smoothing out any air bubbles for a professional finish. If laminating, apply the clear laminate sheet over the printed label before cutting for extra moisture resistance.
Tips for Durable and Moisture-Resistant Labeling Solutions
To protect your bespoke labels, especially on bottles frequently handled in kitchens or refrigerated environments, invest in waterproof label stocks or seal your printed labels with a clear matte spray. This not only preserves their vibrancy but also prevents smudging and peeling. Avoid applying labels directly over condensation or wet surfaces; instead, allow bottles to dry thoroughly.
Chef’s Notes
- For a rustic touch, try kraft paper labels with hand-written names using a fine-tip permanent marker.
- Incorporate QR codes linking to detailed recipes or origin stories, perfect for gifting and sharing your passion.
- Consider eco-friendly, biodegradable label options to align with sustainable kitchen practices.
- If you plan to sell your infused oils and vinegars, check local regulations for mandatory nutritional labeling.
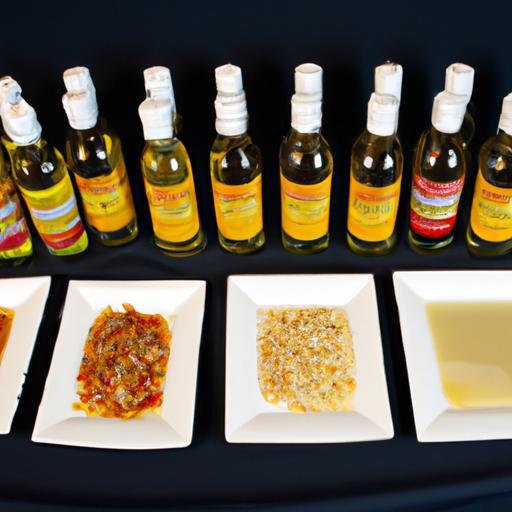
Serving Suggestions
Present your stunningly labeled bottles drip-free in rustic wooden crates or on elegant glass trays. Pair with small tasting cards or mini droppers for an artisanal experience that invites guests to savor the unique flavors contained within. These labels don’t just inform-they create anticipation and charm at every glance.
| Nutritional Info (per 15ml serving) | Calories | Protein | Carbs | Fat |
|---|---|---|---|---|
| Infused Olive Oil | 120 | 0g | 0g | 14g |
| Infused Balsamic Vinegar | 14 | 0g | 3g | 0g |
For more inspiration on creating exquisite infused flavors, visit our Complete Guide to Infused Oils & Vinegars. To explore professional label printing techniques, also read this Printing Industry Guide.

Q&A
Q&A: Mastering the Art: Labeling Your Infused Oils & Vinegars
Q1: Why is labeling infused oils and vinegars important?
A1: Labeling your infused oils and vinegars transforms them from simple kitchen staples into charming, personalized creations. It ensures you remember the unique flavors inside each bottle, keeps your pantry organized, and adds a touch of artistry and professionalism-perfect for gifts or gourmet meals.
Q2: What essential information should I include on my labels?
A2: At minimum, your label should highlight the infusion type (like “Rosemary Garlic Olive Oil”), the date infused, and any special notes (such as storage instructions or flavor intensity). For safety, especially with homemade products, it’s wise to note the best-by date-usually within 1 to 3 months to maintain freshness and flavor.
Q3: How do I make my labels visually appealing?
A3: Think beyond plain text! Use calligraphy or a stylish font, incorporate small illustrations like herbs or vine leaves, and experiment with colors that evoke freshness or richness. Decorative borders, vintage-style tags, or even a handwritten note add a personal flair that invites curiosity and compliments your culinary craft.
Q4: What materials work best for labeling oil and vinegar bottles?
A4: Since oils can be oily and bottles may get moist, choose waterproof or oil-resistant label paper. Vinyl stickers or laminated tags are durable picks. For a rustic vibe, use kraft paper tags tied with twine-just protect them with a clear sealant spray to prevent smudges.
Q5: Any tips for applying labels perfectly?
A5: Start with a clean, dry bottle surface. Warm the bottle slightly with your hands to prevent condensation. Align the label carefully before sticking it on to avoid wrinkles or air bubbles. For tags, position the knot neatly so it doesn’t slip or obscure text. Precision here keeps your presentation crisp and professional.
Q6: Can labeling be part of the flavor experience itself?
A6: Absolutely! Use descriptive words that evoke taste and aroma-like “Zesty Lemon Basil” or “Smoky Chili Lime.” Add sensory details or pairing suggestions (“Great on salads or grilled fish”) to invite a multi-sensory journey. Your labels become a story, enhancing anticipation before the first drop touches the dish.
Q7: How can labeling benefit those who gift infused oils and vinegars?
A7: A well-labeled bottle shows thoughtfulness and care. It informs recipients about the flavors to expect and how to enjoy them, making your gift both beautiful and practical. Plus, personalized labels can create memorable keepsakes-ensuring your homemade infusion stands out among any crowd of treats.
Q8: Where can I find inspiration for label designs?
A8: Dive into culinary blogs, craft marketplaces like Etsy, or vintage apothecary labels for timeless charm. Nature motifs, minimalist aesthetics, or playful typography can spark your creativity. Don’t forget to explore local calligraphy workshops or online design tools to tailor each label to your style.
Mastering the art of labeling infused oils and vinegars elevates your creations beyond mere condiments-transforming bottles into alluring works of edible art. So grab your pens, pretty paper, and a splash of inspiration, and let your labels tell the delicious stories inside!
Closing Remarks
As you embark on the flavorful journey of crafting your own infused oils and vinegars, remember that the art doesn’t end in the bottle-it continues with the label. Thoughtful labeling transforms your kitchen creations from simple condiments into personalized treasures, offering clarity, creativity, and a touch of charm with every pour. By mastering the art of labeling, you not only preserve the essence and freshness of your infusions but also elevate them into stories waiting to be shared. So gather your jars, pens, and imagination, and let each label be a vibrant signature of your culinary craftsmanship-because every great infusion deserves an equally inspiring introduction.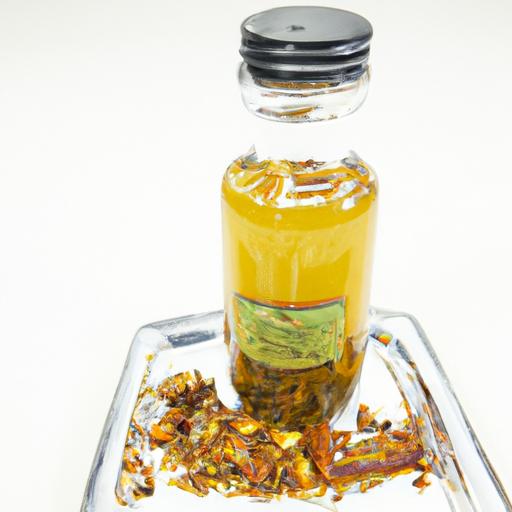
