In the whirlwind of modern living, where every nook seems to brim with an array of containers-jars, bins, boxes, and baskets-the true art of organization lies not just in storage, but in smart labeling. Welcome to “Mastering Chaos: Clever Labeling for Every Container Type,” where we unravel the secrets to transforming clutter into clarity. Whether you’re taming a bustling pantry, a crafty workshop, or a chaotic closet, this guide will equip you with inventive labeling strategies tailored for every container shape and size. Say goodbye to the endless search and hello to effortless order, as we explore how a simple label can be the key to mastering the beautiful chaos of your space.
Mastering Chaos: Clever Labeling for Every Container Type through Tailored Systems
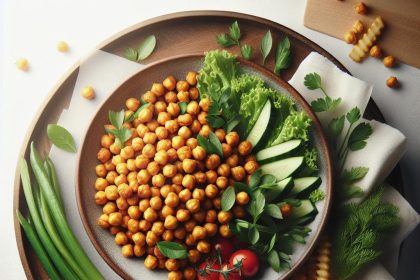
Mastering chaos through clever labeling transforms your kitchen or pantry into a haven of clarity and efficiency. By understanding how to tailor labels by material and usage, you elevate organization from a mundane chore into an inspired system that works around your pace and priorities. This approach isn’t just about neatness-it’s about creating a rhythm that makes cooking and storage intuitive and effortless.
Prep and Setup Time
- Planning & Gathering Materials: 20 minutes
- Designing Color Codes & Symbols: 15 minutes
- Label Application & Final Touches: 25 minutes
- Total Time: Approximately 1 hour
Yield
Complete labeling system suitable for organizing up to 30 different containers in your kitchen or workspace.
Difficulty Level
Medium – Requires planning and some crafting with labeling tools, but very rewarding.
Ingredients & Materials for Your Labeling Project
- Durable waterproof label sheets (preferably vinyl or polyester)
- Color-coded markers or printer ink cartridges (set with high-contrast colors such as red, blue, green, yellow)
- Transparent and matte laminate sheets (to enhance label longevity)
- Symbol stickers or pre-designed icon templates (for quick visual categorization)
- Label maker or high-resolution home printer
- Scissors or craft knife
- Ruler and pencil (for precise measurements)
- Adhesive remover (for corrections and adjustments)
- Small trays or containers for sorting labels by usage frequency
Instructions
- Sort Containers by Material and Usage: Categorize your containers (glass jars, plastic bins, metal tins) and group them by frequency of use (daily, weekly, rarely). This ensures your labels are tailored for durability where needed.
- Create a Color Coding System: Assign specific colors to distinct categories, such as red for spices, blue for grains, green for baking ingredients, and yellow for snacks. Use contrasting shades for visibility. For example, apply bright yellow labels on dark containers for readability.
- Design Symbols for Quick Recognition: Develop simple and clear icons to supplement text-tea leaves for teas, wheat stalks for flours, spice grinders for seasonings. Use free design software or use pre-made icons to align the style across your labels.
- Measure and Cut Labels Precisely: Using your ruler and pencil, mark out label sizes that fit comfortably on each container’s surface. Cut carefully to ensure clean edges, helping maintain a polished look.
- Print and Laminate for Durability: Print your labels on durable, waterproof sheets. Laminate each label with matte or transparent lamination to increase lifespan, especially for containers prone to condensation, like fridge storage.
- Apply Labels Strategically: Clean container surfaces before application to avoid peeling. Place labels on the front-facing side and for large containers, add an extra label on the top or lid for quick overhead identification.
- Organize Labels by Usage Priority: Arrange your containers so the highest-use items are most accessible. Consider grouping those with color-coded labels in prioritized zones for rapid retrieval.
- Maintain and Update: Regularly review your labeling system every few months to retire old containers, refresh worn labels, or adjust the color and symbol codes as your culinary needs evolve.
Chef’s Notes
- Use removable vinyl labels for containers that require frequent refilling or product rotation.
- Substitute hand-drawn symbols with stickers if you want to speed up the labeling process but keep clarity high.
- For a seamless look, use a matching font style for all printed labels that complements your kitchen’s aesthetic.
- Consider using chalkboard labels with pastel chalk pens on some jars to combine adaptability with charm.
- Keep adhesive remover handy for repositioning labels as needed without leaving residue or damage.
Serving Suggestions
Display your color-coded and symbol-labeled containers on open shelves to create a vibrant, orderly tableau. Pair with matching storage baskets or trays in complementary colors to enhance the thematic organization. Highlight your system with minimalistic signage or a key chart nearby for guests or family members to navigate your masterfully organized pantry.
| Label Material | Durability | Best Use | Estimated Cost |
|---|---|---|---|
| Vinyl waterproof label | High moisture resistance | Fridge, freezer, or liquid containers | $$ |
| Polyester film label with lamination | Scratch and tear resistant | Regular countertops and dry storage | $$$ |
| Chalkboard stickers | Reusable & erasable | Frequent content changes | $ |
| Printable adhesive sheets | Moderate | Bulk pantry jars or bins | $ |
For further inspiration on organizing kitchen essentials efficiently, visit The New York Times Kitchen Organization Guide. You might also find our Smart Storage Solutions for Small Kitchens helpful to complement your labeling strategy.

Q&A
Q&A: Mastering Chaos – Clever Labeling for Every Container Type
Q1: Why is labeling containers so important in mastering organizational chaos?
A: Labeling is the secret sauce to turning a cluttered mess into a harmonious system. It brings clarity to chaos by instantly revealing what’s inside each container, saving time and sparing frustration. A clear label transforms containers from mysterious black boxes into visible allies in your daily routine.
Q2: What are some clever labeling strategies for different container types?
A: The key is to tailor your labels to the container’s shape and purpose. For jars, use chalkboard spray paint or adhesive tags for easy updates. Baskets benefit from woven tags, integrating seamlessly with their texture. Transparent containers can use minimalistic corner labels to keep the view unobstructed, while bins suit larger, bold fonts for quick readability from afar.
Q3: How can I keep my labeling system flexible if container contents change often?
A: Opt for erasable labels like dry-erase stickers or chalkboard labels; they let you rewrite without wasting resources. Another clever trick is using clear sleeves slipped over the container, holding printed cards you can swap out at will. This adaptability keeps your system fresh and avoids label clutter.
Q4: Can digital tools enhance physical container labeling?
A: Absolutely! QR codes are a nifty bridge between physical and digital realms. Stick a QR code on your container that links to detailed inventories, recipes, or project notes. This fusion adds depth to simple labels, turning containers into interactive, knowledge-packed hubs.
Q5: How do I maintain aesthetic harmony while labeling diverse containers?
A: Harmonize through a consistent color palette, font choice, or label shape across containers. Think of your labels as tiny design elements-when unified, they create a visually pleasing rhythm that elevates the whole space from chaotic to curated.
Q6: Where should I start if I feel overwhelmed by labeling every container?
A: Start small and strategic. Pick a high-impact area like your pantry or craft supplies. Label containers that cause the most confusion first. Building momentum one label at a time lets you master chaos gradually without feeling buried under a mountain of tasks.
Q7: Any final tips for mastering chaos with clever labeling?
A: Remember, labels are communication tools-make them honest, clear, and a little fun! Use symbols or playful fonts if it suits your vibe. The best labeling system fits seamlessly into your lifestyle and invites you to keep your space effortlessly organized every day.
Concluding Remarks
As we conclude our journey through the art of mastering chaos with clever labeling, remember that each container-be it a jar, box, or drawer-holds more than just items; it holds potential. The right label transforms clutter into clarity, frustration into efficiency, and everyday mess into a masterpiece of organization. By tailoring your labeling approach to every container type, you’re not just managing space-you’re crafting harmony from disorder. So, embrace the power of precise, thoughtful labeling and watch as your environment shifts from chaotic to captivating, one container at a time.

