In the bustling chaos of a busy kitchen, freezer space often feels like prime real estate-precious, limited, and always in high demand. Enter the humble Ziploc bag, a simple kitchen staple with untapped potential to revolutionize the way you freeze soups and save space. “Freeze Soup Flat” isn’t just a clever phrase; it’s a game-changing technique that transforms bulky, clunky containers into streamlined, stackable packs of deliciousness. Whether you’re meal prepping for the week or preserving last night’s homemade broth, mastering these easy Ziploc bag tips will help you maximize your freezer’s capacity-and keep your soup fresh and ready to enjoy, without the freezer chaos. Ready to freeze smarter, not harder? Let’s dive into the art of freezing soup flat.
- Prep and Cook Time
- Yield
- Difficulty Level
- Ingredients
- Step-by-Step Guide to Preparing Your Soup for Freezing in Ziploc Bags
- Creative Labeling and Stacking Techniques to Maximize Freezer Space
- Tips for Thawing and Reheating Flat-Frozen Soup for Best Flavor and Texture
- Chef’s Notes
- Serving Suggestions
- Q&A
- Wrapping Up
Freeze Soup Flat: Easy Ziploc Bag Tips for Space Saving
Freezing soup flat is a game-changer in kitchen efficiency and meal prep, offering an ingenious way to store your favorite homemade soups without sacrificing precious freezer space. This method not only optimizes storage but also preserves the vibrant flavors and textures you love, making every thawed bowl taste freshly made.
Prep and Cook Time
Preparation Time: 15 minutes (plus soup cooking time)
Cook Time: Varies by soup recipe (usually 30-60 minutes)
Yield
Approximately 4 servings per quart-sized Ziploc bag
Difficulty Level
Easy to Medium, depending on the complexity of your soup
Ingredients
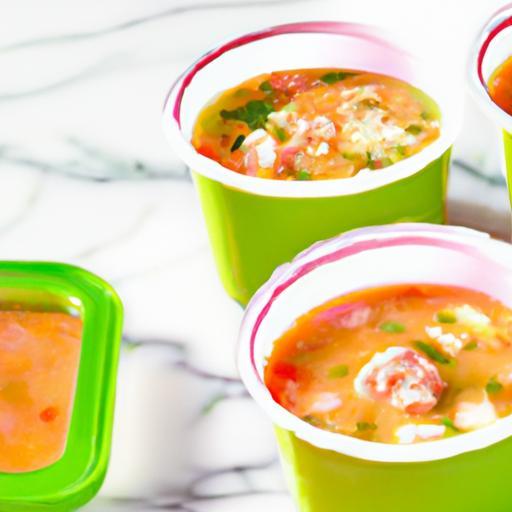
- 4 cups homemade or store-bought soup (any type)
- Ziploc quart-sized freezer bags, heavy-duty recommended
- Permanent marker for labeling
- Flat, clean trays or baking sheets for freezing
Step-by-Step Guide to Preparing Your Soup for Freezing in Ziploc Bags
- Cool the soup completely. Ensure your soup reaches room temperature before freezing to prevent soggy textures and freezer burn.
- Portion your soup. Using a ladle, carefully pour 2-3 cups of soup into each quart-sized Ziploc bag, leaving about 2 inches of space at the top for expansion.
- Remove excess air. Seal most of the bag closed and gently press out the air, flattening the soup evenly inside for optimal space-saving storage.
- Seal fully and smooth. Close the bag completely, then use your hands to smooth out the soup into a thin, uniform layer approximately 1 inch thick.
- Label each bag. Using a permanent marker, write the soup type and date of freezing on one flat side (see Creative Labeling below).
- Freeze flat. Place each bag flat on a tray inside the freezer. Freeze for 4-6 hours or until solid.
Creative Labeling and Stacking Techniques to Maximize Freezer Space
Labeling isn’t just functional-it’s an opportunity to make your freezer look beautiful and organized. Write on the flat side of each bag using clear, large letters with a colored marker for easy readability. Date each soup and include key ingredients to quickly identify flavors.
Once frozen solid, slide the flat soup packs vertically like books on a shelf or stack them horizontally in neat piles. You can use a shallow basket or box lined with parchment paper between layers for quick access without sticking. This method keeps the freezer clutter-free and ensures you can grab just the portion you need.
Tips for Thawing and Reheating Flat-Frozen Soup for Best Flavor and Texture
- Thaw gradually. Transfer the frozen flat soup pack to your refrigerator overnight. This slow thaw maintains soup integrity by preventing separation or mushiness.
- Reheat gently. Pour the thawed soup into a pot over low to medium heat, stirring occasionally. Avoid boiling to preserve delicate flavors and texture.
- For quick thawing, submerge the sealed bag in a bowl of cold water for 1-2 hours, changing water if needed. Reheat immediately after.
- Shake and stir. If your ingredients settle during freezing, a quick shake of the bag before reheating and stirring during warming restores perfect consistency.
Chef’s Notes
- Soups with high starch or cream content may thicken after freezing. Thin with broth or water during reheating.
- Vegetables like potatoes and pasta can change texture; consider slightly undercooking them before freezing.
- Flat freezing reduces ice crystal build-up, keeping your soup fresher longer-up to 3-4 months.
- Experiment with freezing homemade broth separately to mix fresh ingredients later.
Serving Suggestions
Once reheated, serve your soup with crisp artisan bread or warm buttered rolls. Garnish with fresh herbs like parsley, chives, or a swirl of cream to elevate the presentation and add an extra layer of flavor. A sprinkle of toasted seeds or grated cheese can also add delightful texture contrasts.
| Nutrient | Per 1 Cup Frozen Soup |
|---|---|
| Calories | 120 |
| Protein | 5g |
| Carbohydrates | 15g |
| Fat | 4g |
Enhance your soup preparation skills by exploring our related article on how to make homemade broth, which complements freezing techniques perfectly. For additional food safety tips, visit the USDA Food Safety and Storage Guidelines.

Q&A
Q&A: Freeze Soup Flat – Easy Ziploc Bag Tips for Space Saving
Q1: Why should I freeze soup flat instead of in a container?
A1: Freezing soup flat in a Ziploc bag not only saves precious freezer space but also speeds up the freezing and thawing process. Unlike bulky containers, flat bags stack neatly and take up less room, turning your freezer into an organized oasis rather than a cluttered chaos.
Q2: How do I properly freeze soup flat in a Ziploc bag?
A2: Pour cooled soup into a sturdy gallon-sized Ziploc bag, leaving about an inch of space at the top for expansion. Seal the bag almost completely, squeezing out excess air, then lay it flat on a baking sheet or cookie tray to freeze. Once solid, you can stack the flat pouches for easy storage.
Q3: Can all soups be frozen flat this way?
A3: Most soups freeze beautifully flat, especially broths, creamy bisques, and blended varieties. Chunky soups with large solid ingredients can be frozen this way too, just be gentle when spreading the contents flat to avoid bursting the bag.
Q4: What are some clever tips to make flat freezing easier?
A4: Use a funnel or ladle to pour your soup into the bag to avoid mess. Label each bag with the type of soup and date using a permanent marker. For extra protection, double-bag if your soup contains sharp veggies or bones that might poke holes.
Q5: How long does frozen soup last in a flat Ziploc bag?
A5: When properly sealed and frozen flat, soup can last up to 3-4 months without losing flavor or texture. Just thaw overnight in the fridge or for quicker results, submerge the sealed bag in cold water.
Q6: What about reheating flat-frozen soup?
A6: Once thawed, peel the soup out of the bag into a pot or microwave-safe bowl. The flat shape means the soup defrosts evenly, so you won’t have icy chunks or hot spots. Stir gently as you reheat for a delicious, cozy meal.
Q7: Can this method be used for other liquids or sauces?
A7: Absolutely! The flat freeze technique works brilliantly for stocks, sauces, smoothies, and even pancake batter. It’s a versatile, space-savvy hack that turns any freezer into a clutter-free zone.
Ready to give your freezer a makeover? Freeze your soups flat in Ziploc bags and stack your way to kitchen zen-space saved, soups loved!
Wrapping Up
Freezing soup flat in Ziploc bags isn’t just a clever trick-it’s a game-changer for anyone looking to optimize freezer space and meal prep efficiency. With these simple yet effective tips, you can say goodbye to bulky containers and hello to streamlined storage that saves both room and time. So next time you simmer up a big batch, remember: a little flattening goes a long way in turning your freezer chaos into organized convenience. Happy freezing-and even happier eating!


