There’s something undeniably magical about biting into a perfectly golden, crispy chicken tender-the satisfying crunch giving way to juicy, tender meat that melts in your mouth. Fried chicken tenders have become a beloved comfort food staple, adored for their simplicity, versatility, and irresistible flavor. Whether you’re a seasoned home cook aiming to master the craft or a curious foodie eager to explore new techniques, “Crispy Bliss: The Ultimate Guide to Fried Chicken Tenders” is your passport to unlocking the secrets behind the perfect fry. From choosing the right cut and seasoning to mastering the art of breading and frying, this guide dives deep into every step needed to create tenders that are crispy on the outside, tender on the inside, and downright unforgettable. Prepare to embark on a culinary journey that will forever change the way you enjoy this classic favorite.
Crispy Bliss: The Ultimate Guide to Fried Chicken Tenders
Crispy bliss begins with selecting the ideal chicken cut that ensures every bite is juicy and tender beneath an irresistibly crunchy coating. Crafting fried chicken tenders that combine succulent meat with a golden crust is an art, perfected through understanding the nuances of preparation, breading, and frying techniques. Whether you’re aiming for a quick weekday dinner or impressing guests at a weekend gathering, this guide will inspire confidence and culinary delight in every step.
Prep and Cook Time
- Preparation: 20 minutes
- Marination: 2 hours (recommended for maximum tenderness)
- Cooking: 15 minutes
- Total Time: Approximately 2 hours 35 minutes
Yield
Serves 4 generously (about 16 tenders)
Difficulty Level
Medium – Mastery is achievable with simple tips and patience
Ingredients
- 1.5 lbs chicken tenderloins, trimmed
- 1 cup buttermilk, chilled
- 1 teaspoon smoked paprika
- 1 teaspoon garlic powder
- 1 teaspoon onion powder
- 1 teaspoon kosher salt
- ½ teaspoon freshly cracked black pepper
- 1½ cups panko breadcrumbs
- ½ cup all-purpose flour, sifted
- 2 large eggs
- Vegetable oil for frying (about 4 cups)
Instructions
- Prepare the marinade: In a bowl, whisk together the buttermilk, smoked paprika, garlic powder, onion powder, salt, and black pepper. Submerge the chicken tenderloins fully and refrigerate for at least 2 hours to tenderize and infuse flavors.
- Set up your breading station: Place the sifted flour in the first shallow dish. In a second dish, beat the eggs until smooth. In the third dish, spread out the panko breadcrumbs evenly.
- Breading the chicken: Remove the tenders from the marinade, letting excess drip off. Dredge each piece lightly in flour, then dip into the beaten eggs, and finally coat with panko breadcrumbs, pressing gently to adhere the crispy coating.
- Heat the oil: Pour vegetable oil into a deep skillet or Dutch oven to a depth of about 2 inches. Heat over medium-high heat until it reaches 350°F (175°C). Use a thermometer for best results; maintaining oil temperature is key to golden perfection.
- Fry the tenderloins: Carefully add the tenders in batches, avoiding overcrowding, which lowers oil temperature. Fry until golden brown and cooked through, about 5-6 minutes, turning once for even browning.
- Drain and rest: Using a slotted spoon, transfer the tenders onto a wire rack set over paper towels to drain excess oil. This keeps the crust crisp instead of soggy.
- Serve promptly: Enjoy while hot for the ultimate crispy bliss experience.
Tips for Success
- Cut Choice: Opt for chicken tenderloins or thinly sliced chicken breasts to ensure tenderness and even cooking.
- Buttermilk Magic: The acidity in buttermilk breaks down proteins in the chicken, yielding a succulent texture and helping the coating stick.
- Panko Breadcrumbs: Their flaky texture contributes to an ultra-crispy crust. For added flavor, try seasoning panko with a pinch of cayenne or herbs.
- Frying Temperature: Use a thermometer to maintain 350°F. If it’s too low, tenders absorb excess oil; too hot, and the crust burns before cooking through.
- Make-Ahead: Marinate the chicken overnight for deeper flavor. Coated tenders can be refrigerated for up to 1 hour before frying to keep the crust intact.
- Alternative Cookware: An air fryer or oven can yield tasty results but won’t replicate the signature golden crunch of classic frying.
Serving Suggestions
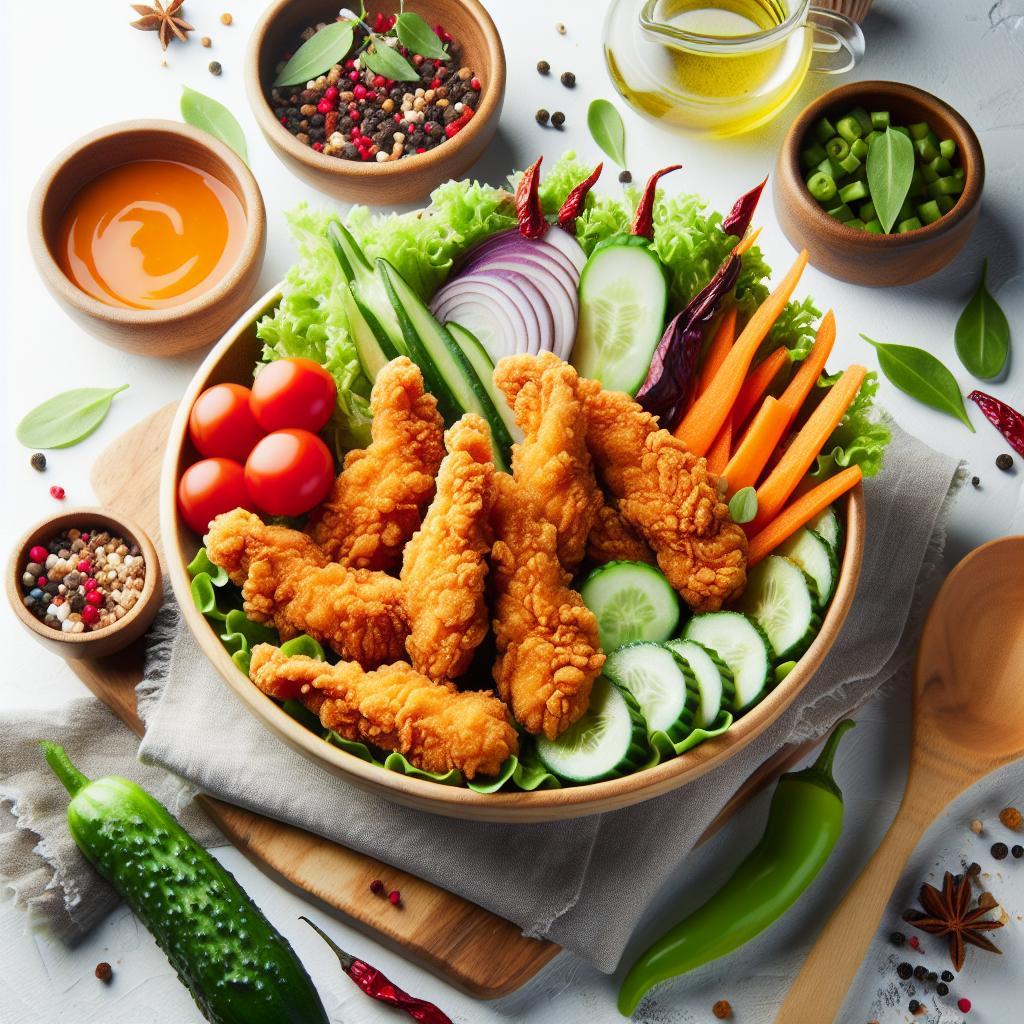
Present your crispy chicken tenders on a rustic wooden board garnished with fresh parsley or thin lemon wedges to add a zesty brightness. Accompany with a trio of dipping sauces like creamy ranch, honey mustard, and spicy sriracha aioli for tantalizing flavor contrasts. Pair with a crisp slaw or lightly seasoned sweet potato fries for a balanced and colorful meal.

| Nutrient | Per Serving (4 pieces) |
|---|---|
| Calories | 380 kcal |
| Protein | 35 g |
| Carbohydrates | 20 g |
| Fat | 18 g |
For a deeper dive into breading techniques and crispy coatings, explore our comprehensive breading guide. Additionally, authoritative culinary insights on buttermilk’s tenderizing effects can be found on Serious Eats.
Q&A
Q&A: Crispy Bliss – The Ultimate Guide to Fried Chicken Tenders
Q1: What makes a fried chicken tender truly crispy and irresistible?
A1: The secret to irresistibly crispy chicken tenders lies in a perfect balance of moisture and crunch. Start with fresh, high-quality chicken tenders, then coat them in a seasoned flour or breadcrumb mixture. Double dredging-dipping first in a wet batter or buttermilk, then in seasoned flour-locks in moisture while creating a crackling crust. Frying at the right temperature (around 350°F or 175°C) ensures the crust crisps up quickly without absorbing excess oil, delivering that golden, crunchy bliss.
Q2: Can I get equally crispy chicken tenders without deep-frying?
A2: Absolutely! Baking or air-frying are fantastic alternatives. For baking, coat your tenders in a crunchy panko or cornflake crust and bake at a high temperature (about 425°F or 220°C), flipping halfway to maintain even crispiness. Air-fryers excel at circulating hot air to mimic deep-frying results, often with less oil. Both methods produce wonderfully crispy exteriors while keeping the inside juicy and tender.
Q3: How do seasoning blends influence the flavor profile of fried chicken tenders?
A3: Seasoning is where creativity shines! From classic garlic and paprika to adventurous spices like cumin, smoked chili, or turmeric, your chosen blend transforms tenders from simple to sensational. Incorporate herbs such as thyme or oregano, or add a hint of heat with cayenne or black pepper. Season the coating and the chicken itself for layered flavor that pops through that crispy crunch.
Q4: What’s the best chicken cut to use for tenders, and can I make tenders from whole chicken breasts?
A4: Traditional chicken tenders come from the strip muscle beneath the breast, prized for its tenderness and uniformity. However, you can absolutely slice whole chicken breasts into strips if tenders aren’t available. Just ensure even cutting for uniform cooking, and consider pounding thicker pieces for consistent thickness. This way, every bite cooks evenly and stays juicy inside that crispy shell.
Q5: How important is resting time after frying, and what’s the best way to rest chicken tenders?
A5: Resting helps the juices redistribute within the chicken, optimizing tenderness. After frying, place tenders on a wire rack set over a baking sheet rather than paper towels to avoid sogginess from trapped steam. Resting for 5 to 10 minutes allows the crust to set and the interior to remain succulent-perfect for that ideal bite.
Q6: What dipping sauces pair best with crispy chicken tenders?
A6: The crispy crunch of fried chicken tenders loves a good dip! Classic choices like honey mustard, tangy barbecue, and creamy ranch are timeless. For a creative twist, try spicy sriracha mayo, zesty lemon aioli, or a smoky chipotle crema. The key is contrast-creamy, tangy, or spicy sauces complement the savory, crispy exterior beautifully.
Q7: Can I prepare chicken tenders ahead of time for a big gathering?
A7: Yes! You can bread the chicken tenders and refrigerate them for a few hours or even overnight, tightly wrapped to keep them fresh. Alternatively, freeze them unbaked on a tray, then transfer to a freezer bag. When ready to serve, fry or bake them straight from the fridge or freezer-just adjust cooking times accordingly. This prep saves time and ensures everyone enjoys crispy, fresh tenders hot off the fryer.
This Q&A blends imaginative tips with reliable techniques, turning any cook into a crispy fried chicken tender maestro!
The Way Forward
As the golden crust crackles and the tender meat melts on your tongue, it’s clear that mastering the art of fried chicken tenders is more than just a recipe-it’s a celebration of texture, flavor, and culinary joy. Whether you’re a kitchen novice or a crispy connoisseur, armed with these tips and techniques, your journey to crispy bliss is well underway. So grab your favorite dipping sauce, invite good company, and savor every crunchy, juicy bite. Because in the world of comfort food, a perfect chicken tender isn’t just a meal-it’s an experience worth frying for.

