In the heart of every comforting meal lies a secret-a golden elixir simmered low and slow, transforming humble scraps into a symphony of flavor. “From Scraps to Sip: Crafting Flavorful Broth at Home” invites you on a culinary journey where nothing goes to waste and every peel, bone, and stem finds new life. Beyond being just a base for soups, broths are a nourishing, aromatic essence that elevates dishes while honoring sustainability and creativity in the kitchen. Join us as we uncover the art and science of turning kitchen leftovers into liquid gold, proving that the most flavorful creations often begin with the simplest ingredients.
From Scraps to Sip: Crafting Flavorful Broth at Home
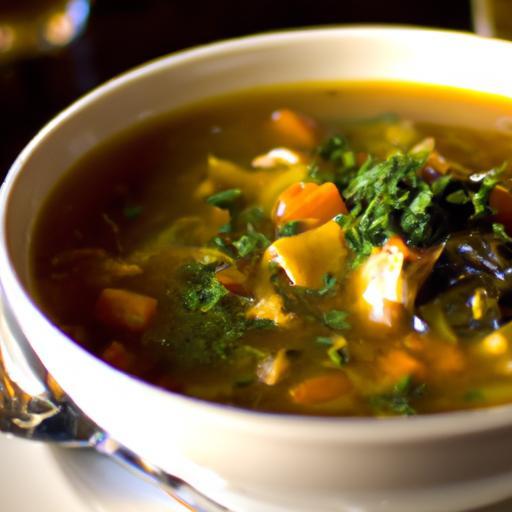
Embarking on the journey to create the perfect broth transforms humble kitchen scraps into a deeply nourishing elixir, elevating every dish it graces. This art of broth-making is both sustainable and rewarding, unlocking layers of flavor through gentle simmering and thoughtful seasoning. Whether you’re seeking a rich base for soups, stews, or simply a warm, restorative sip, mastering this craft brings unmatched depth to your culinary repertoire.
Prep and Cook Time
Preparation: 15 minutes
Cook Time: 4 to 6 hours (slow simmering for maximum flavor extraction)
Yield
Approximately 8 cups (about 2 quarts) of broth
Difficulty Level
Medium – requires some patience but minimal hands-on time
Ingredients
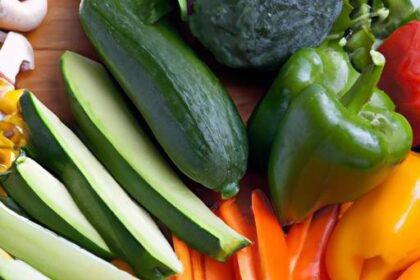
- 4 cups vegetable scraps (e.g., carrot peels, celery ends, onion skins, mushroom stems)
- 2 bone-in chicken thighs or 1 pound beef bones (optional for a richer, meat-based broth)
- 1 large onion, quartered (keep the skin on for extra color)
- 2 carrots, chopped
- 2 celery stalks, chopped
- 4 cloves garlic, smashed
- 1 bay leaf
- 6 whole black peppercorns
- 2 sprigs fresh thyme or 1 teaspoon dried thyme
- 1 sprig fresh rosemary (optional)
- 2 tablespoons apple cider vinegar (helps extract minerals from bones)
- Cold water to cover (about 10 cups)
- Salt to taste (add at the end to control seasoning)
Instructions
- Gather and prepare your ingredients. Collect fresh, clean scraps and bones. Rinse bones under cold running water to remove any impurities.
- Roast the bones (optional for deeper flavor). Preheat your oven to 425°F (220°C). Spread bones on a baking sheet and roast for 30-40 minutes until golden brown.
- Combine all ingredients in a large stockpot. Place roasted bones (or raw, if skipping step 2), vegetable scraps, onion, carrots, celery, garlic, bay leaf, peppercorns, thyme, rosemary, and apple cider vinegar into the pot.
- Add cold water. Pour enough cold water to fully cover the ingredients by about an inch (approximately 10 cups), but avoid overfilling.
- Bring to a simmer. Slowly heat the pot over medium heat until it just starts to simmer. Avoid boiling to keep the broth clear and prevent cloudiness.
- Skim impurities. Within the first 30 minutes, use a ladle to gently remove any foam or scum that rises to the surface for a clean broth.
- Simmer gently. Reduce heat to low and let the broth gently simmer, uncovered or partially covered, for at least 4 hours. For beef or chicken broth, simmer for up to 6 hours for optimal flavor extraction.
- Strain the broth. When done, carefully strain the broth through a fine mesh sieve or cheesecloth into a large bowl. Discard solids or compost vegetable scraps to complete your sustainable process.
- Cool and store. Cool broth to room temperature, then refrigerate in airtight containers. Fat will rise and solidify on top, which can be skimmed off or mixed back in depending on preference.
- Season to taste. Add salt as needed just before using or serving to maintain control over the final flavor.
Chef’s Notes: Tips for Success
- Customizing Your Broth: Experiment with herbs like parsley, sage, or bay leaf alternatives. For an Asian-inspired broth, add star anise or ginger during simmering for a fragrant twist.
- Vegetarian Options: Use hearty vegetables such as mushrooms, parsnips, and leeks for an umami-packed vegetarian broth.
- Storage Guidance: Broth can be refrigerated for up to 5 days or frozen for up to 3 months. Freeze in ice cube trays for convenient single-use portions.
- Dealing with Cloudiness: Maintain a gentle simmer rather than a rolling boil and skim impurities promptly.
- Sustainability Tip: Keep a bag in your freezer to collect scraps continuously, so you’re always ready for broth-making without extra shopping.
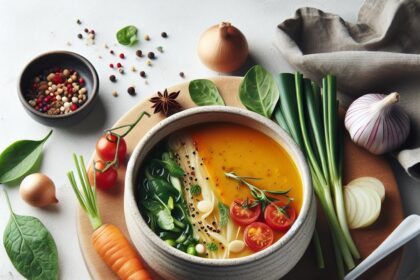
Serving Suggestions
This versatile broth shines on its own, garnished with fresh parsley, a squeeze of lemon, and a sprinkle of cracked black pepper for a soothing sip. Alternatively, use it as a base in hearty soups, risotto, or braised dishes to add remarkable depth. Serve with crusty bread or steamed rice for a comforting meal. Don’t hesitate to drizzle a bit of extra-virgin olive oil or a dash of chili flakes for a bold finish.
| Nutrient | Per Cup |
|---|---|
| Calories | 45 |
| Protein | 6 g |
| Carbohydrates | 1 g |
| Fat | 1.5 g |

For more inspiration, explore our Ultimate Guide to Homemade Soups or discover nutritional benefits of bone broth at Healthline.
Q&A
Q&A: From Scraps to Sip – Crafting Flavorful Broth at Home
Q1: What does “From Scraps to Sip” mean in the context of making broth?
A1: “From Scraps to Sip” is all about transforming kitchen leftovers-like vegetable peels, onion skins, and chicken bones-into a rich, flavorful broth. It’s a creative way to reduce waste while crafting a delicious base for soups, stews, or sipping on its own.
Q2: Why should I consider making broth at home instead of buying it pre-made?
A2: Homemade broth offers unparalleled depth of flavor free from preservatives and added sodium. Plus, it’s customizable-you control the ingredients and can tailor it to dietary needs or flavor preferences. And let’s not forget the joy of turning bits that might otherwise be thrown away into liquid gold!
Q3: What types of scraps are best for broth-making?
A3: Vegetable scraps like carrot tops, celery ends, mushroom stems, and onion skins are fantastic. For meat broths, save chicken bones, beef marrow bones, or fish frames. Avoid overly bitter scraps like broccoli stems or cruciferous leaves, which might overpower the broth.
Q4: How do I properly prepare and store scraps for broth?
A4: Rinse scraps lightly to remove dirt but avoid over-washing, which can wash away flavor. Store them in a zip-top bag or container in the freezer until you accumulate enough for a batch. Freezing helps prevent spoilage and preserves freshness.
Q5: What is the basic process for turning scraps into broth?
A5: Start by placing your scraps in a large pot or slow cooker. Cover with cold water, add aromatics like garlic, peppercorns, or bay leaves, and bring to a simmer. Simmer gently for several hours-2-3 for vegetable broth, 6-24 for meat bones-to extract maximum flavor and nutrients. Strain, cool, and store.
Q6: How can I enhance my broth’s flavor without overpowering it?
A6: Use fresh herbs in moderation, a splash of acid like apple cider vinegar to help draw minerals from bones, and balance with salt near the end of cooking. Avoid adding too many strong spices; subtlety is key to a versatile broth.
Q7: What are some creative ways to use homemade broth beyond soups?
A7: Use it as a cooking liquid for grains and legumes, a base for risottos, sauces, and gravies, or even as a nourishing warm drink. You can freeze it in ice cube trays for handy flavor bursts when sautéing or roasting veggies.
Q8: Are there any safety tips I should know?
A8: Always cool broth quickly after cooking and refrigerate or freeze within two hours to prevent bacterial growth. When reheating, bring to a boil to ensure safety. Use bones from trusted sources to avoid contamination.
Q9: How long does homemade broth last?
A9: In the refrigerator, broth will keep 3-4 days. Frozen, it can last up to 3-6 months when stored in airtight containers or heavy-duty freezer bags.
Q10: What’s the biggest benefit of making broth from scraps at home?
A10: Beyond saving money and reducing waste, homemade broth nourishes your body and soul with wholesome, comforting flavors that commercial broths can’t match. It elevates everyday cooking into an art form that honors the entire ingredient, leaving no scrap behind.
To Wrap It Up
Transforming kitchen scraps into a rich, flavorful broth is more than just a clever way to reduce waste-it’s a delicious testament to the art of resourcefulness. With every peel, bone, and herb stem, you’re crafting a potion that warms the soul and elevates your meals. So next time you’re tempted to toss those odds and ends, remember: beneath those humble scraps lies the secret to a homemade broth that’s as nourishing as it is sustainable. Embrace the magic of broth-making, and let your kitchen become a haven where flavors are born anew, one simmer at a time.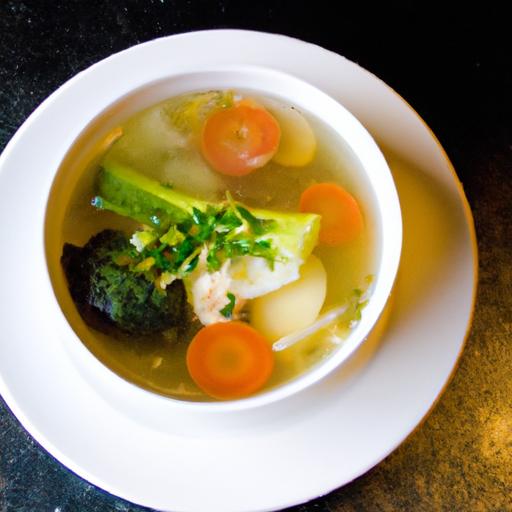


